A Cobb 500 chick arrives at your brooding house weighing 42–44g. By Day 7, that same chick must weigh 160–200g. That is a 4× to 4.8× increase in body weight in seven days — and it is not optional. It is the biological foundation on which every subsequent week of the production cycle is built.
Miss this window, and you do not get a second chance. The compensatory growth mythology — the idea that a slow-starting bird can “catch up” later in the cycle — is one of the most expensive misconceptions in commercial broiler production. The research is unambiguous: chicks that fail to reach 160g by Day 7 show statistically significant deficits in Day 35 and Day 42 body weight that nutritional or management interventions in weeks 3–6 cannot fully recover. A 30g deficit at Day 7 typically translates to a 150–200g deficit at slaughter. Across a flock of 20,000 birds, that is 3,000–4,000 kg of saleable meat that does not exist — not because of disease, not because of genetics, but because of what happened in the first seven days.
The goal of this article is to give you the exact biological understanding, nutritional protocol, and management checklist to hit 200g by Day 7 consistently — not occasionally, not on your best batches, but as a repeatable standard.
The Science of the Pre-Starter Diet
The Transition No One Talks About
The most demanding biological event in the entire 42-day production cycle is not the final growth push in week 6. It is the transition occurring in the first 24–48 hours of life: the shift from yolk-sac nutrition to exogenous feed digestion.
A chick at hatch is still metabolising the residual yolk sac — a nutrient-dense lipid and protein reserve that sustained it through the final stages of incubation. This yolk provides approximately 24–48 hours of nutritional buffer after placement. The moment that the buffer is exhausted, the chick becomes entirely dependent on what it can find, consume, and digest from its environment. If the feed is not immediately accessible, highly palatable, and — critically — digestible by an immature gut, that transition fails and early growth stalls.
Standard starter feed is formulated for a chick whose digestive system is already functional. It is not formulated for the 24–72 hour window when that system is still developing. This is the gap that a purpose-formulated pre-starter diet fills.
Digestibility Is the Only Metric That Matters
A pre-starter diet is not simply a higher-protein version of starter feed. The protein level matters less than the protein source and its digestibility by an enzyme-deficient gut. The key specifications for an effective pre-starter formulation are as follows.
Protein sources must be highly digestible and low in anti-nutritional factors. Soy protein concentrate (SPC) — not full-fat soybean meal — provides amino acids in a form the developing gut can absorb without the trypsin inhibitors present in conventional soybean meal. Fish meal at 4–6% inclusion provides highly bioavailable methionine, lysine, and threonine at the precise point when the bird’s amino acid requirement per unit of body weight is at its lifetime peak. Spray-dried plasma protein, where the budget allows, provides immunoglobulins alongside amino acids and has been shown in multiple trials to improve early gut health and feed intake simultaneously.
Starch sources must be pre-cooked or gelatinized. Raw starch requires active amylase for digestion — an enzyme that the neonatal chick produces in insufficient quantities. Extruded or steam-processed grains deliver starch in a gelatinized form that requires minimal enzymatic activity to absorb, making the calories immediately available for growth rather than partially passing through undigested.
Energy density must be high. The pre-starter period is not the time to manage feed cost by reducing energy specification. Target a metabolizable energy of 3,000–3,050 kcal/kg with crude protein at 22–24% and digestible lysine at 1.40–1.50%. These figures are substantially above a standard broiler starter specification and reflect the actual nutritional demand of a rapidly developing chick in the first week of life.
The Enzyme Gap — Exogenous Supplementation
Neonatal chicks have measurably low endogenous production of the three digestive enzymes most critical to feed utilization: amylase (starch digestion), protease (protein digestion), and lipase (fat digestion). These enzyme systems develop and up-regulate over the first 10–14 days of life, reaching functional maturity around Day 10–12. Before that point, a significant proportion of the nutrients in standard feed pass through the gut without being absorbed.
Adding exogenous enzyme complexes to the pre-starter diet directly compensates for this deficit. A well-chosen multi-enzyme product containing amylase, protease, xylanase, and phytase will measurably improve nutrient digestibility coefficients in the first week, recovering amino acids and energy that would otherwise be lost. The return on investment for exogenous enzyme inclusion in pre-starter feed is among the highest of any additive in the broiler production toolkit, with published trials consistently showing Day 7 weight improvements of 8–15g per bird from enzyme inclusion alone.
The Cobb 500 Amino Acid Response
The Cobb 500 genotype shows a particularly strong growth response to optimised amino acid density in the first 72 hours compared to other commercial strains. This is a function of the breed’s exceptionally high early satellite cell proliferation rate — the biological mechanism by which muscle fibers are added during the neonatal period. Satellite cell division requires a continuous supply of branched-chain amino acids, particularly leucine, and is directly limited by amino acid availability in the bloodstream.
Feed a Cobb 500 chick a high-density amino acid pre-starter in the first 72 hours, and you are not simply feeding a hungry bird — you are activating a genetic programme for muscle fibre proliferation that sets the structural template for the entire production cycle. The muscle fibres laid down in Days 1–7 are the fibres that will be filled with protein and fat in weeks 4–6. More fibres established early means greater capacity for late-cycle growth. This is the biological basis of the 4× rule — and why the Cobb 500, specifically, responds to pre-starter optimisation more dramatically than slower-growing or less genetically refined breeds.
The Otto’s Farms Brooding Protocol
The 100-Lux Lighting Rule
Light intensity in the first 24 hours is not a welfare consideration — it is a production input. A chick that cannot easily locate feed and water trays in a dimly lit house will spend its first critical hours wandering rather than eating. Every hour of delayed first feed intake in the post-yolk transition window is measurable growth lost.
Maintain a minimum of 100 lux at chick level for the first 24–48 hours of placement. This is bright enough that feed and water surfaces are immediately visible to a newly placed chick from several body lengths away. After 48 hours, light intensity can be stepped down progressively — 50 lux by Day 4, 20 lux from Day 7 onward — to reduce activity and direct energy toward growth rather than movement. The 100-lux rule applies regardless of your standard lighting programme. It is a brooding-specific protocol, not a production-phase setting.
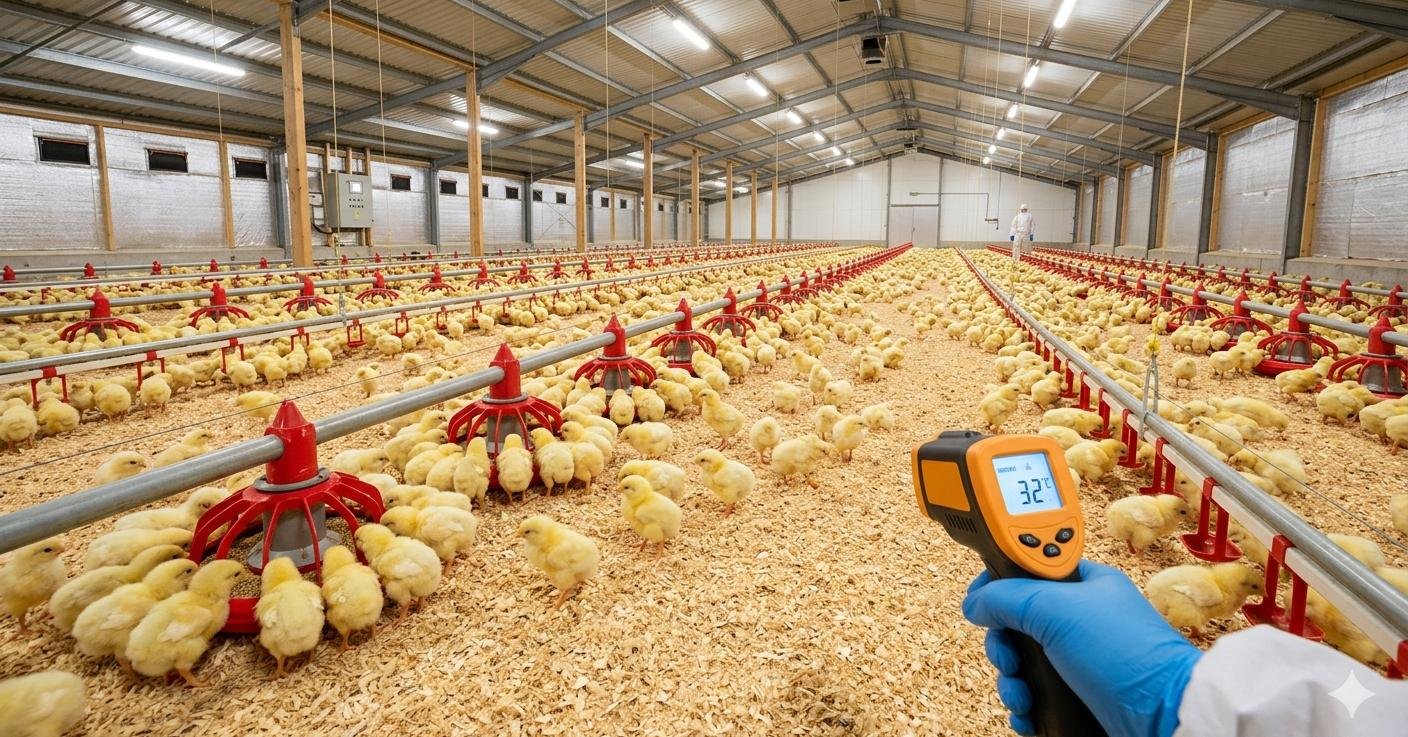
Floor Temperature vs. Air Temperature — Warm Feet First
This is the management error responsible for more missed Day 7 targets than any nutritional deficiency. Farmers monitor air temperature at sensor height and assume the brooding environment is correct. The chick does not live at sensor height — it lives on the floor, and floor temperature is consistently 3–5°C lower than air temperature in houses with inadequate floor heating or poorly managed litter.
A chick on a floor surface below 28°C is cold. Its metabolic response to cold is to divert energy from growth to thermoregulation — shivering, huddling, and reducing voluntary activity. A cold chick does not explore. A chick that does not explore does not find feed. A chick that does not find feed in the first 12 hours does not reach 200g by Day 7.
Measure floor temperature directly with an infrared thermometer at multiple points across the brooding area at placement and at 6 hours post-placement. Target 30–32°C at floor level for day-old chicks, reducing by 0.5°C per day. Do not accept air temperature readings as a proxy for floor conditions. They are not the same measurement.
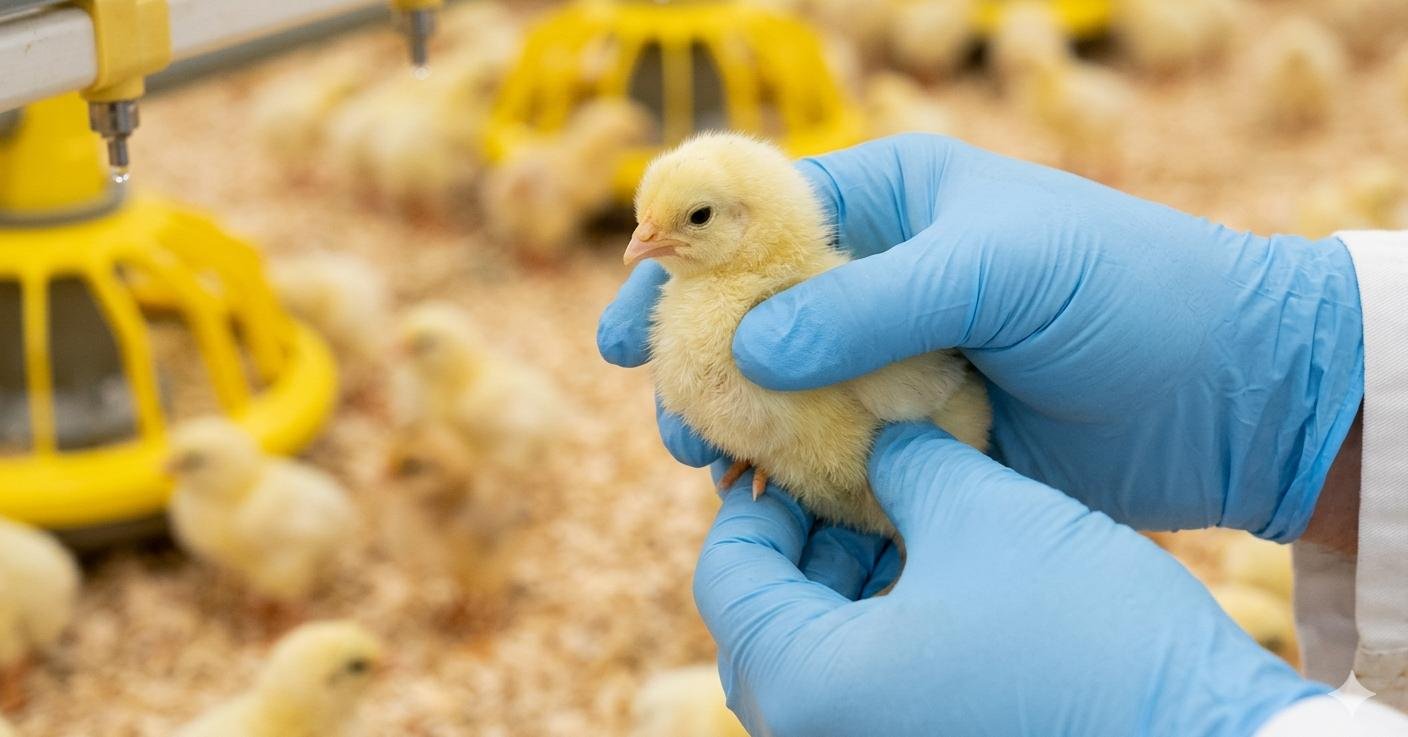
The Crop Fill Test — Your Non-Negotiable KPI
The crop fill test is the single most actionable management tool in early brooding and the fastest feedback mechanism available to identify feeding and watering failures before they become production losses.
The method is simple. Catch 50–100 birds randomly distributed across the brooding area. Gently palpate the crop of each bird with thumb and forefinger. A correctly fed chick has a crop that is palpably full, distended, soft, and dough-like in consistency. An empty crop is flat. A hard, compacted crop indicates dehydration or feed impaction.
At 8 hours post-placement, a minimum of 80% of sampled chicks must have full, soft crops. A figure below 70% requires immediate investigation — check feed accessibility, water temperature, floor temperature, and light intensity before the next check.
At 24 hours post-placement: 95–100% crop fill is the standard. Any flock below 90% at 24 hours has already begun accumulating a Day 7 weight deficit that nutritional adjustment alone cannot fully recover.
Run the crop fill test at 8 hours and 24 hours without exception. It takes 15 minutes and gives you the earliest possible warning of a brooding failure. It is the CEO’s KPI because it tells you whether your investment in pre-starter feed, heating, and lighting is actually reaching the birds — or not.
Water: The First Feed
Hydration Precedes Nutrition
A dehydrated chick will not eat. This is not a conditional statement — it is a physiological fact. The gut epithelium requires adequate hydration to maintain the mucus layer that enables nutrient absorption. A chick that arrives from a hatchery after 12–24 hours of transit has already lost 5–8% of its body weight in water. Before that bird can utilise the pre-starter diet you have invested in, it must rehydrate.
Ensure drinkers are running and accessible at the chick level before placement begins. Check water temperature at the drinker: 20–25°C is optimal. Water below 18°C reduces voluntary intake in newly placed chicks. Water above 28°C provides inadequate cooling benefit and reduces palatability. In hot climates, insulate header tanks and supply lines to maintain drinker water temperature within this range — a protocol covered in detail in the heat stress management article in this series.
The Glucose Strategy — First 6 Hours
In the first 4–6 hours post-placement, before the gut has reactivated and before the pre-starter diet is efficiently absorbed, the chick’s most immediate energy requirement is blood glucose. Providing glucose or a simple electrolyte-glucose solution in the drinking water during this window delivers instantly bioavailable energy to a bird that has been fasting since late incubation and stressed by hatchery and transport handling.
Use glucose at 25–30g per litre of drinking water, or a commercial electrolyte product with equivalent glucose content, for the first 4–6 hours only. Do not extend beyond 6 hours — prolonged glucose supplementation suppresses the chick’s appetite for solid feed, which is the opposite of the intended outcome. After 6 hours, flush the lines and switch to clean, plain water. The glucose window is a targeted intervention, not a standard brooding additive.
Nipple Height — The 45-Degree Rule
Nipple drinker height is one of the most frequently mis-set variables in brooding management, and the consequences are immediate. A nipple set too high requires the chick to stretch uncomfortably to reach it — most day-old chicks will attempt once or twice and abandon the effort, returning to dehydration. A nipple set too low encourages splashing that wets the litter, creating the ammonia and coccidiosis risk that is examined in the management mistakes section below.
The correct setting is the 45-degree rule: when a chick of average size for your placement stands normally beneath the nipple and extends its neck to drink, its neck should form approximately a 45-degree angle with the vertical. The nipple tip should be at eye level of the chick when standing — neither above the head nor at ground level. Check nipple height at placement with actual day-old chicks in the house, not by measurement alone. Adjust every 3–4 days as chick height increases through the first two weeks.
The Day 7 Benchmark Table
| Day 7 Live Weight | Classification | Projected Day 42 Impact | Action Required |
|---|---|---|---|
| Below 140g | Critical underperformance | 200–300g deficit at slaughter | Immediate investigation of brooding, feed, and water management |
| 140g – 159g | Sub-optimal | 100–200g deficit at slaughter | Review floor temperature, crop fill data, and feed physical form |
| 160g – 179g | Standard industry performance | On-target for breed average | Maintain protocol, monitor for ammonia and density issues |
| 180g – 199g | Good — above industry average | Ahead of the breed average curve | Minor optimisation opportunities remain |
| 200g and above | Otto’s Farms Elite Performance | Maximum genetic potential is being expressed | Replicate conditions precisely in every subsequent batch |
The relationship between Day 7 weight and Day 42 outcome is not linear — it is multiplicative. A chick that reaches 200g by Day 7 has established more muscle fibres, a more developed intestinal villi structure, and a stronger immune foundation than a 140g chick of identical genetic origin. Every subsequent week of the cycle, that structural advantage compounds. The elite performance bird does not just start ahead — it continues to widen the gap at every weekly weigh-in.
Avoiding the Growth Check — Five Mistakes That Kill Day 7 Targets
Feed Physical Form — Mash Is Not Acceptable
Mash feed is the lowest-cost physical form of poultry ration and the least effective for early chick nutrition. Day-old chicks have small beaks, limited beak strength, and no capacity to sort through a heterogeneous mash to select palatable particles. Mash feed also segregates during transport and storage, meaning the fine particles — often the most nutrient-dense fraction — settle to the bottom and are the last consumed.
Micro-pellets (1.5–2.0mm diameter) or high-quality uniform crumbles are the correct physical form for pre-starter and starter feed. Uniform particle size ensures every beak-full delivers the same nutrient density. The physical form requires no sorting, no selective feeding, and minimal beak effort — removing every physical barrier between the chick and the nutrients it needs. The cost premium for micro-pellets over mash in pre-starter feed is recovered in Day 7 weight improvement within the first batch.
Ammonia — The Invisible Weight Suppressor
Ammonia is produced by the bacterial decomposition of uric acid in litter and accumulates rapidly in poorly ventilated brooding houses, particularly in the first week when litter moisture from drinker spillage and chick excretion is at its highest relative to house volume.
The threshold that most farmers tolerate — “I can smell it, but it’s not too bad” — corresponds to approximately 25–35 ppm. The threshold at which ammonia begins measurably suppressing feed intake and Day 7 body weight is 20 ppm. At 20 ppm, research consistently shows a 10–15g reduction in Day 7 live weight. At 40 ppm, the deficit reaches 25–30g and respiratory damage begins accumulating. At 50 ppm and above, you are causing permanent damage to the tracheal epithelium that will reduce respiratory efficiency for the entire production cycle.
Do not rely on your nose to manage ammonia. Your nose adapts to ammonia exposure within 20–30 minutes and becomes unreliable as a detection instrument. Use a calibrated ammonia meter at chick level — not at standing height, where ammonia concentration is consistently lower than at floor level, where chicks breathe. Maintain ammonia below 10 ppm in the first week through pre-heating litter before placement, managing drinker height to prevent spillage, and providing adequate minimum ventilation even in cold weather.
Stocking Density in the Brooder — Competition Kills Uniformity
In the first week, the relationship between stocking density and Day 7 weight operates through a mechanism different from later production phases. The primary effect is not heat stress or air quality — it is feed and water access competition. In an overstocked brooder, smaller and weaker chicks are physically displaced from feeder and drinker access by larger littermates. The variation within the flock compounds daily, and by Day 7 the coefficient of variation in body weight — the measure of flock uniformity — is substantially higher in overstocked brooders than in correctly stocked ones.
Target a maximum of 30–35 chicks per square meter in the brooding area for the first 7 days. Ensure feeder space of at least 2.5cm per chick and drinker nipple ratios of no more than 10–12 chicks per nipple. Flock uniformity at Day 7 is as commercially important as average weight — a flock with a high average but high coefficient of variation will produce inconsistent carcass weights at slaughter that create grading and pricing problems downstream.
Litter Quality — The Platform for Everything Else
Litter condition at placement determines floor temperature stability, ammonia risk, pathogen load, and foot pad health simultaneously. Fresh, dry litter at 28–30°C floor temperature is the platform on which every other brooding intervention performs. Wet, compacted, or re-used litter without adequate treatment undermines floor temperature, generates ammonia faster, and increases early coccidiosis and necrotic enteritis challenge — any one of which will suppress Day 7 weight independently of your nutritional programme.
If you are re-using litter between batches — a common economic decision in high-cost litter markets — treat it with an approved litter amendment to reduce bacterial load and ammonia-generating urase enzyme activity before placement. Allow the treated litter to reach the target floor temperature before chicks arrive. Do not place chicks on cold, untreated, reused litter and expect pre-starter nutrition to compensate. It will not.
The Foundation of Your ROI
The economics of hitting 200g by Day 7 versus 160g are straightforward and significant. In a 20,000-bird house, a 40g difference in Day 7 weight translates to approximately 180–220g per bird at Day 42 slaughter, assuming equivalent management through the production cycle. At a conservative dressed weight yield of 72%, that is approximately 130–160g of additional saleable meat per bird. Across 20,000 birds at a market price of $2.50 per kg dressed, that is $6,500–$8,000 of additional revenue per batch — from the same house, the same genetics, the same labor, and the same fixed cost base.
The cost of implementing the full pre-starter protocol described in this article — micro-pellet pre-starter feed with enzyme inclusion, correct lighting, floor heating verification, and glucose supplementation — adds approximately $0.08–$0.14 per bird in variable cost. The return per bird at 200g Day 7 performance versus 160g is $0.33–$0.40 per bird. The ROI on correct early nutrition and brooding management is not marginal. It is the highest-return investment available in the production cycle, which is why the first seven days are not the start of the race — they are where the race is won.