Every laying hen that produces 300+ eggs in a 52-week cycle started somewhere. She started in the first 48 hours of brooding — a window so biologically critical that mistakes made during it cannot be fully corrected at any later stage of production.
This is not an exaggeration. The first two days of a pullet’s life determine gut microbiome establishment, immune system activation, early skeletal development, and the feeding and drinking behaviors she will carry through the entire rearing period. A chick that fails to eat within the first 24 hours of placement loses irreplaceable developmental time. A chick that is too cold during the first 48 hours directs energy toward thermogenesis instead of growth, permanently compressing her early development trajectory.
For layer farmers, the first 48 hours of brooding is the single highest-return management window in the entire production cycle. Getting it right costs very little. Getting it wrong costs everything downstream.
Why the First 48 Hours Are Biologically Different
A day-old chick arrives at the farm still dependent on its yolk sac — the residual nutrient reserve absorbed from the egg during incubation. The yolk sac provides energy and passive maternal antibodies for approximately 48–72 hours post-hatch.
During this window, three simultaneous biological processes are racing against each other:
Gut transition. The chick’s digestive system shifts from yolk-sac nutrition to external feed. Villus development in the small intestine — the structural basis of nutrient absorption — accelerates rapidly in response to feed contact. Chicks that access feed within 2 hours of placement develop significantly longer intestinal villi by day 7 compared to chicks with delayed feed access. Longer villi mean greater absorptive surface area, better nutrient uptake, and lower FCR throughout the grow-out period.
Immune system activation. Passive immunity from maternal antibodies transferred through the yolk sac begins declining from day one. Active immunity — the chick’s own immune response — begins developing as the bursa of Fabricius, thymus, and spleen activate. Early nutritional support accelerates this transition. Chicks that are nutritionally compromised in the first 48 hours show measurably weaker immune responses to vaccination at day 7–10.
Thermoregulation establishment. Day-old chicks cannot regulate their own body temperature effectively. They are functionally poikilothermic — their body temperature tracks environmental temperature — until feather coverage develops sufficiently at approximately day 10–14. During the first 48 hours, the brooding environment must substitute entirely for the heat the hen would provide in a natural setting.
These three processes are not sequential. They run simultaneously, compete for the same limited energy reserve, and are all conditional on the brooding environment being correct.
Pre-Placement Preparation: What Must Happen Before Chicks Arrive
Brooding success begins 24–48 hours before chicks arrive, not at the moment of placement. A house that is not pre-warmed, pre-filled, and pre-tested when chicks are placed cannot be corrected after the fact.
House Pre-Warming
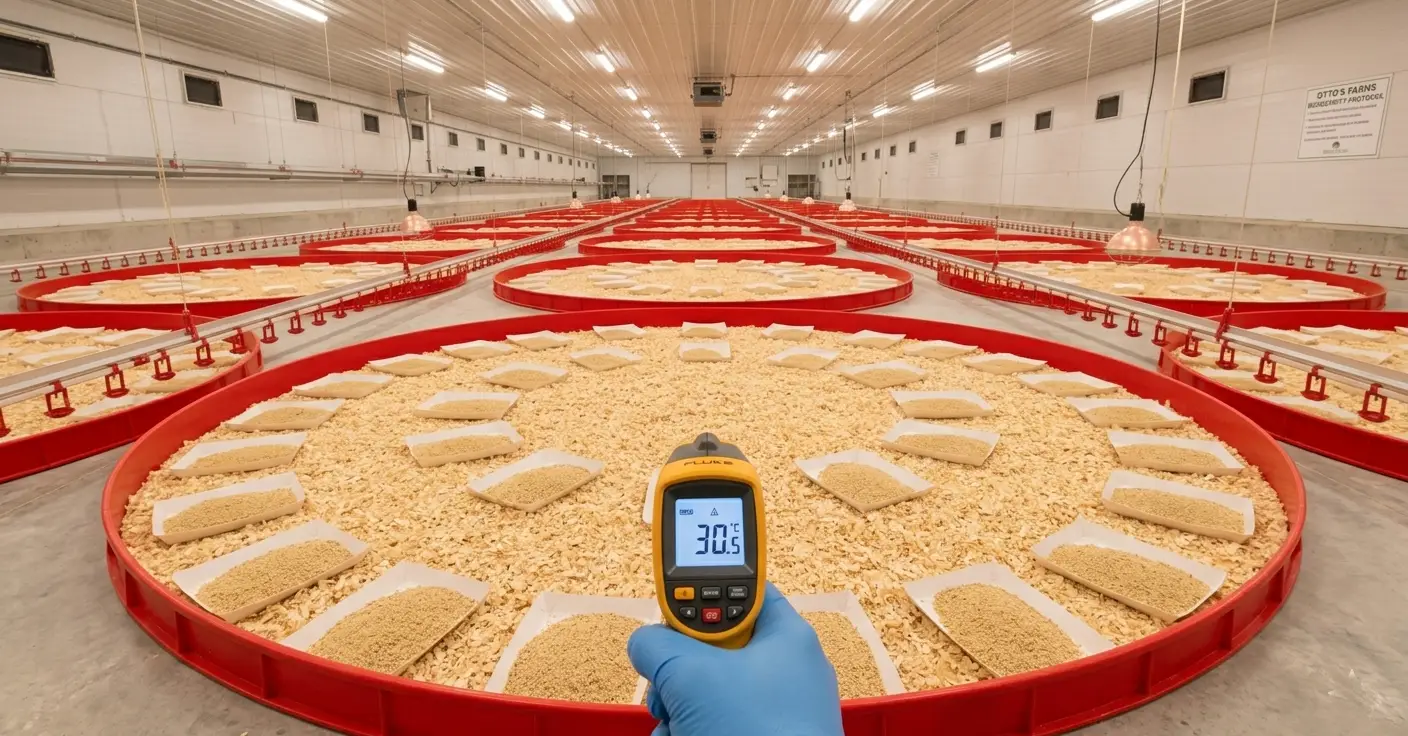
Switch on all heat sources — gas brooders, electric brooders, or radiant panels — at least 24 hours before chick arrival. The target is not the air temperature at ceiling height. It is the litter surface temperature and air temperature at chick level (5 cm above the litter).
Pre-warming targets:
- Air temperature at chick level: 32–34°C
- Litter surface temperature: 28–30°C (verify with an infrared thermometer)
- Relative humidity: 60–70%
A house pre-warmed for 24 hours reaches a stable, even temperature distribution throughout the brooding space. A house heated for only 2–3 hours before placement will have temperature gradients — warm near brooders, cold at the perimeter — that cause chick crowding, uneven access to feed and water, and early mortality from chilling.
Feed and Water Setup
Feeders and drinkers must be filled and operational before the first chick enters the house. This is non-negotiable.
Feed setup:
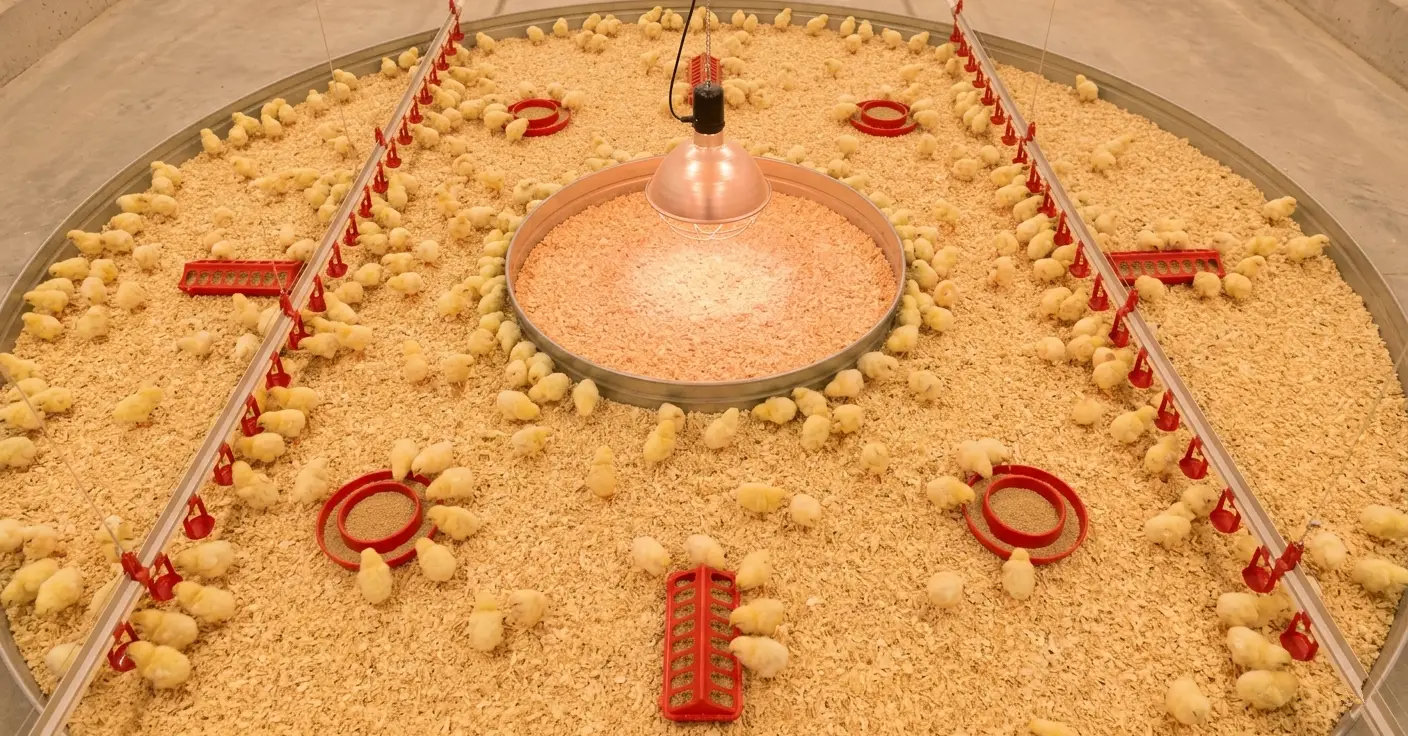
- Spread supplemental feed on paper trays, egg flats, or shallow lids placed throughout the brooding area for the first 48–72 hours. This encourages feeding behavior in chicks that have not yet learned to find circular feeders or chain feeders.
- Place paper trays every 1.0–1.5 meters so that no chick needs to travel more than 75 cm to find feed.
- Starter crumble — not mash, not pellets — is the correct physical form for day-old chicks. Crumble particle size of 1.0–2.0 mm matches beak size and swallowing capacity at this age.
Water setup:
- Drinkers must be operational and filled before placement. For nipple drinker systems, verify water flow at every nipple by triggering each one manually.
- Nipple drinker height on day one: position the nipple at eye level of the chick (approximately 5–6 cm above litter), so chicks discover it by natural head movement rather than requiring an upward reach.
- For bell drinkers or open drinkers, a water depth of 1.0–1.5 cm is appropriate for day-old chicks. Water deeper than 2.0 cm creates a drowning risk.
- Water temperature matters. Cold water below 20°C suppresses water intake in chicks that are already challenged by environmental thermoregulation. Pre-warm or allow drinker lines to reach ambient temperature before placement.
Brooding Area Demarcation
Do not allow day-old chicks access to the entire house floor area from day one. Confine them to the brooding zone using chick guards — curved cardboard or metal panels forming a circular enclosure 3–4 meters in diameter per 500 chicks.
The purpose of chick guards is threefold: they keep chicks close to heat sources, feed, and water; they prevent chicks from straying into cold perimeter zones; and they eliminate corner traps where chicks pile and suffocate.
Expand the guarded area progressively — typically every 2–3 days — as chicks develop mobility and thermoregulatory capacity.

The First Two Hours After Placement: What to Watch
Chick placement is not the end of the pre-brooding process. It is the beginning of the assessment process. The first two hours after placement reveal whether the brooding environment is correct or requires immediate adjustment.
Reading Chick Behavior
Chick distribution and behavior in the brooding area is the most accurate real-time temperature sensor available. No thermometer reading substitutes for observing how chicks are responding to the environment.
What correct brooding looks like:
- Chicks are evenly spread across the brooding area
- Active movement toward feeders and drinkers
- Quiet, low-level vocalization
- No persistent clustering or piling
What incorrect brooding looks like:
| Behavior | Cause | Immediate Action |
|---|---|---|
| Tight clustering under the brooder | Too cold — increase heat | Raise brooder temperature or lower brooder height |
| Spread to the perimeter, away from the brooder | Too hot — reduce heat | Raise the brooder or reduce the heat output |
| Clustering along one side wall | Drafts from that direction | Locate and seal the draft source |
| Piling in corners | Temperature gradients + corner trap | Adjust the chick guards to eliminate corners |
| Gasping, labored breathing | Fumes, poor ventilation | Increase ventilation, check gas brooder combustion |
| Quiet, hunched, eyes closed | Chilling or disease | Check the temperature first, then the health status |
Respond to these behavioral signals within 15–30 minutes of identifying them. A house that is 2°C too cold during the first 48 hours costs more in growth suppression than the inconvenience of adjusting equipment.
The 8-Hour Crop Fill Check
At 8 hours post-placement, conduct a crop fill assessment across a representative sample of chicks (minimum 100 birds, randomly selected across the brooding area).
Gently palpate the crop — the food storage pouch located at the base of the neck, slightly to the right. Classify each chick:
- Full and soft: Feed and water intake are adequate. Target: 95%+ of sampled chicks.
- Full and hard: Chick has eaten but not drunk sufficient water. Check water access and nipple flow rate.
- Empty: Chick has not been fed. Indicates feed access failure, temperature problem, or sick chick.
If fewer than 80% of sampled chicks show full, soft crops at 8 hours, the placement is in trouble. Diagnose the specific cause — feed visibility, water access, temperature — and correct it before the 12-hour mark. The gut development window does not pause while the problem is being identified.
Temperature Management: The First 48-Hour Schedule
Temperature management during brooding is not a fixed setting. It is a dynamic response to chick behavior, ambient conditions, and time.
Recommended Temperature Schedule
| Age | Target Air Temperature at Chick Level | Notes |
|---|---|---|
| Pre-placement (24hr before) | 32–34°C | Verified at the litter level, not the ceiling height |
| Day 1 (0–24 hours) | 32–34°C | Adjust based on chick behavior, not the thermometer alone |
| Day 2 (24–48 hours) | 31–33°C | Begin monitoring for signs of active thermoregulation |
| Day 3–7 | Reduce by 0.5°C/day | Target 28–30°C by the end of week 1 |
| Week 2 | 26–28°C | Feather cover beginning; reduce heat dependency |
| Week 3 onward | 24–26°C | Continue stepping down toward the ambient |
In tropical climates where ambient temperatures are already 28–32°C, heat management during brooding is less about adding heat and more about preventing overheating. Daytime ambient temperatures above 30°C in West Africa mean that supplemental heat may only be needed during night hours and early mornings.
Monitor day-night temperature swings. A difference of more than 5°C between the coldest and warmest periods of the 24-hour cycle during the first week of brooding is enough to suppress chick performance measurably.
Relative Humidity During Brooding
Humidity targets are as important as temperature targets and far more frequently ignored in West African layer production.
Low humidity (below 40%) dehydrates chicks — the mucous membranes of the respiratory tract dry out, increasing susceptibility to respiratory pathogen entry, and the yolk sac absorption process slows. Day-old chicks in a low-humidity environment exhibit dehydration signs (dry, tacky skin over the hock joints, dull eyes) that are often misdiagnosed as chilling.
High humidity (above 75%) prevents evaporative cooling and creates wet litter conditions that favor pathogen growth from day one.
Target 60–70% relative humidity during the first 48 hours. In harmattan season or during dry-season cold nights in highland areas of Cameroon and Nigeria, a simple water tray placed near but not under brooders can raise humidity adequately in a small brooding space.
Water Quality: The Input That Cannot Be Compromised
Day-old chicks drink before they eat in most cases. Water is the first external input the gut receives, and its quality directly affects early intestinal microbiome establishment.
Water Quality Standards for Brooding
- pH: 6.0–7.0. Acidic water at this range discourages pathogenic bacterial growth in the water line and drinking equipment.
- Total bacterial count: Below 100 CFU/mL at the point of consumption (drinker). Well water or surface water used without treatment routinely exceeds 10,000 CFU/mL — a bacterial challenge that overwhelms the day-old chick’s developing immune system.
- Chlorination: Maintain 3–5 ppm free residual chlorine in drinker water for the first week. Flush lines daily to prevent biofilm accumulation.
- Hardness: Water with very high mineral content (calcium, magnesium) reduces vaccine efficacy when vaccines are administered through drinking water. Treat with a water acidifier before vaccine administration if the hardness exceeds 200 ppm.
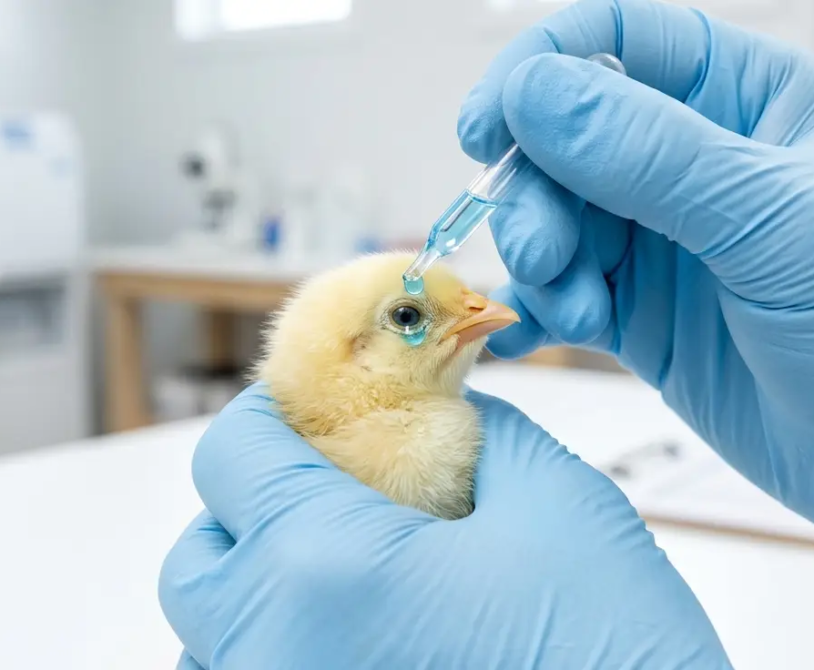
Electrolyte and Glucose Supplementation
Adding oral electrolytes and glucose (dextrose) to drinking water for the first 24–48 hours supports energy availability during the transition from yolk sac nutrition to external feed and helps maintain hydration in chicks that have experienced transport stress.
Standard supplementation: 5 g glucose + 1 g electrolyte powder per liter of water for the first 24 hours. Remove supplementation before any antibiotic or vaccine administration through water, as sugar solutions can reduce drug absorption.
Feed Formulation for the Brooding Starter Period
The layer chick starter ration must be formulated for the specific demands of the first two weeks, not the same ration used through week 6 or 8.
Layer Chick Starter Targets (Day 1–14)
| Nutrient | Target Level |
|---|---|
| Crude Protein | 20–22% |
| Metabolizable Energy | 2,850–2,950 kcal/kg |
| Lysine | 1.20–1.30% |
| Methionine + Cystine | 0.85–0.90% |
| Calcium | 0.90–1.00% |
| Available Phosphorus | 0.45–0.50% |
Note that layer starter calcium levels (0.90–1.00%) are intentionally lower than the calcium levels used during lay (3.5–4.2%). High calcium in the starter ration depresses appetite and can cause kidney damage in young chicks whose renal system is not yet equipped to process high calcium loads. This is a formulation error seen frequently in small-scale operations that use a single ration across all production phases.
Coccidiostats (amprolium or diclazuril) should be included in the starter ration if birds are reared on litter and coccidiosis pressure is present in the environment, which it is on most farms in West and Central Africa that have operated for more than one cycle.
Mortality in the First 48 Hours: Normal vs. Abnormal
Some early mortality is expected and normal. The standard acceptable range for first-week mortality in layer chicks is 0.5–1.0% total, with the majority occurring in the first 72 hours from chicks that were compromised at hatch (navel infections, yolk sac abnormalities, low hatch weight).
Mortality above 2% in the first 48 hours is not normal and requires immediate investigation.
Common causes of above-normal early mortality:
- Chilling: Chicks found dead with empty crops and a huddle distribution pattern before death. Check the brooder function and litter surface temperature.
- Dehydration: Chicks found with a dry, shrunken appearance. Indicates water access failure or water line pressure too high for day-old chicks to activate nipples.
- Navel infection (omphalitis): Chicks with enlarged, unhealed navels and signs of septicemia. A hatchery hygiene problem — notify your hatchery supplier.
- Infectious disease (Marek’s, IBD early challenge): Requires laboratory diagnosis. Collect fresh dead birds in sealed bags at 4°C and submit to a veterinary laboratory within 24 hours of death.
- Suffocation from piling: Found in corner areas; chicks on the bottom of the pile are crushed. Immediately adjust chick guards and evaluate draft sources triggering piling behavior.
Record Keeping: What to Document in the First 48 Hours
Data collected in the first 48 hours establishes the baseline against which all subsequent performance is measured. Minimum records for this period:
- Chick arrival time and observed chick quality (percentage with open, bright eyes; navel healing status; average apparent weight)
- House temperature at placement (chick level, three points in the brooding area)
- Relative humidity at placement
- 8-hour crop fill assessment result (% full, % full-hard, % empty)
- 24-hour mortality count and cause assessment
- 48-hour mortality count and cumulative mortality percentage
- Feed consumption for first 48 hours (weigh feed in vs. feed remaining)
- Any behavioral observations requiring corrective action and action taken
This record becomes the reference point for interpreting performance at week 3, week 6, and at first egg. When a flock underperforms later in the cycle, the first place to look is the first 48 hours.
Summary
The first 48 hours of brooding are not a preliminary phase before the real work of layer production begins. They are the foundation on which every subsequent performance metric is built.
A pullet that arrives at a properly pre-warmed house, finds feed and water within two hours of placement, maintains adequate body temperature throughout the first two days, and establishes a healthy gut microbiome during yolk sac transition will reach point-of-lay with better immune competence, better skeletal development, better uniformity, and a stronger laying trajectory than a pullet whose first 48 hours were compromised.
The cost of getting this right — the electricity to pre-warm the house, the paper trays, the electrolyte powder, the time spent on crop fill assessment — is trivial relative to the value of the 52-week laying cycle that follows.
Spend that cost. Every time.