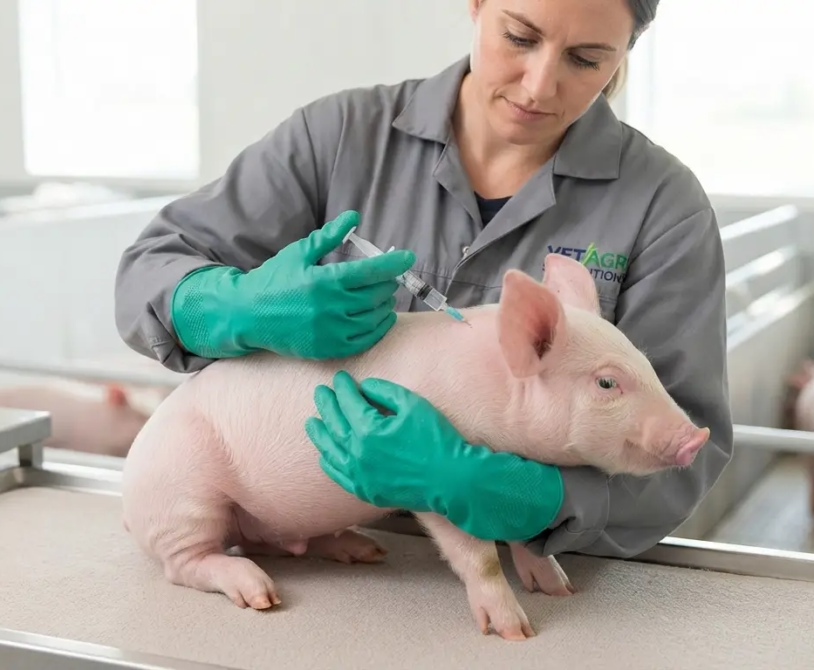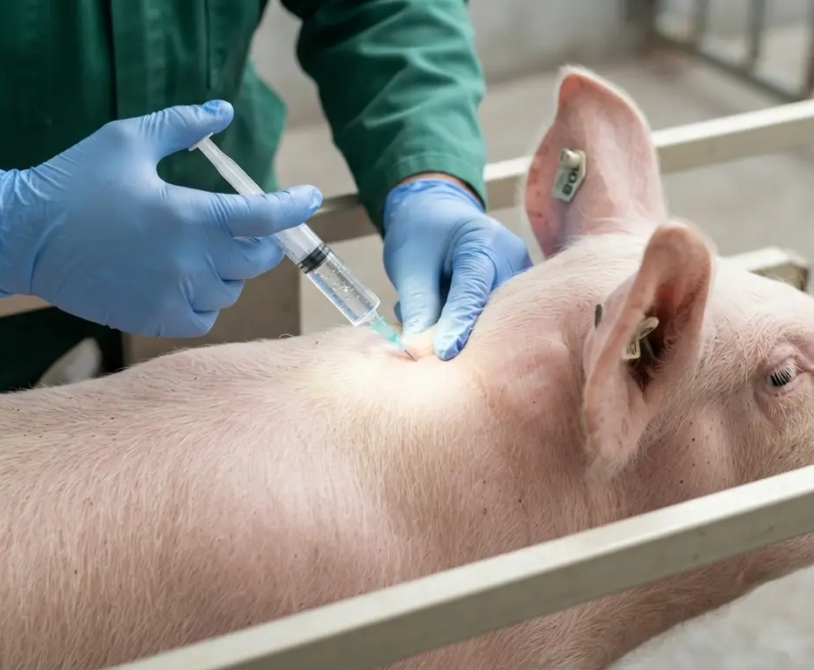
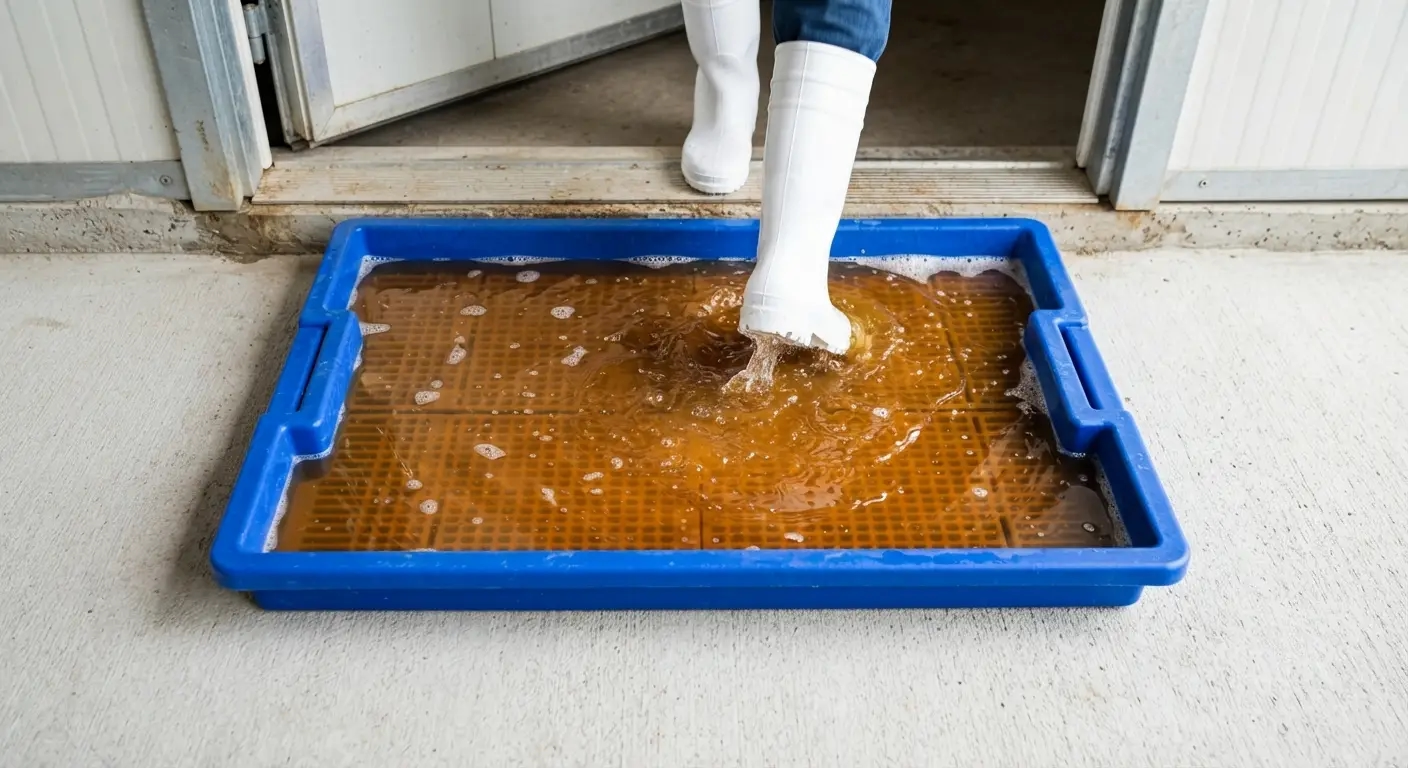
The difference between a biosecurity protocol and a biosecurity system is the difference between a rule and a structure. A rule says “visitors must change their footwear before entering the pig houses.” A structure makes it physically impossible to enter the pig houses without changing footwear, because the pathway from the visitor parking area to the pig houses passes through a changing facility that requires the transition. The rule depends on compliance. The structure enforces the transition regardless of compliance.
This distinction matters because the pathogens that commercial pig farms must exclude — PRRS, African Swine Fever, Foot and Mouth Disease, Mycoplasma, Salmonella — do not care whether the person carrying them intended to comply with the farm’s biosecurity rules or simply forgot. The ASF-contaminated mud on a feed delivery driver’s boot does not become harmless because the driver is trustworthy and well-intentioned but did not notice the contamination on his wheel arch before driving into the farm’s service area.
The dirty-clean zone system is the physical translation of biosecurity principles into farm infrastructure — the buildings, barriers, surfaces, and pathways that make the biosecurity transition a physical event that every person and vehicle must complete rather than a behavioral choice they are expected to make. This guide covers the design principles, specific facility specifications, construction materials, and management protocols that create a functional dirty-clean zone system from the farm gate inward.
The Design Principle — Contamination Cannot Flow Backward
The fundamental design principle of a dirty-clean zone system is directional flow control: contamination moves in one direction only — from clean production zones outward toward the dirty external environment — and the physical design of every pathway, facility, and transition point enforces this directionality.
The violation this principle prevents: A person who walks from the dirty external environment into a changing facility, changes into clean farm clothing, and then returns to the dirty zone to retrieve something they forgot — bringing their clean farm clothing into contact with the dirty zone — has contaminated their clean clothing and negated the entire purpose of the changing procedure. A changing facility designed without directional flow control (a simple room where entry and exit are through the same door) creates this violation as a routine operational possibility.
The physical implementation: Every transition point from dirty to clean should require passing through a one-way facility where:
- Entry is from the dirty side
- Exit is from the clean side
- Return to the dirty side after completing the transition is physically prevented or made conspicuously deliberate (requiring opening a specific barrier or door that communicates “you are re-entering the dirty zone”)
This directionality does not require complex construction — it can be achieved with a simple changing room that has entry and exit doors on opposite walls, separated by the clothing change station in between. But it must be designed in, not assumed to emerge from behavioral compliance.
The Zone Map — Establishing Boundaries Before Building
Establishing Zones on the Farm Plan
Before any construction begins, map the complete zone structure on a scaled drawing of the farm:
Zone 1 (Dirty — External/Public Zone):
- Everything outside the farm perimeter fence
- Vehicle parking for all non-farm vehicles (personal vehicles of staff, delivery vehicles, visitor vehicles)
- The public road
- Neighboring properties and their boundaries
Zone 2 (Transition/Service Zone — Restricted but not fully sterile):
- Inside the perimeter fence, outside individual production buildings
- Feed storage and delivery area
- Staff vehicle parking (farm vehicles only)
- Changing facility and shower entry point from Zone 1
- Veterinary service and treatment area
- Dead animal storage point (positioned at the Zone 1-Zone 2 boundary for collection access without entry deeper into the farm)
- Farm office and management facilities
- Waste management infrastructure (positioned downslope and downwind from production buildings)
Zone 3 (Clean — Production Zone):
- All production buildings and their immediate surroundings
- Access only via the Zone 2-to-Zone 3 transition facility
- Within Zone 3, individual building footbaths create sub-zones at each house level
The physical boundaries:
- Zone 1-to-Zone 2: perimeter fence with a single controlled entry gate
- Zone 2-to-Zone 3: a physical barrier (fence, wall, or building) with a single controlled transition point through the personnel changing and shower facility
- Zone 2-to-Zone 3 vehicle crossing: a vehicle wash station or disinfection point for any vehicle that must enter Zone 3
The rule about boundaries: Every boundary must be a physical feature — not a painted line, not a sign, not a policy document. A fence, a wall, a building, a locked gate. Physical features enforce the transition; marks and signs are ignored when inconvenient.
The Personnel Transition Facility
The Changing Room / Shower Block — The Most Critical Structure
The personnel transition facility is the single most important biosecurity infrastructure element on the farm, because it is the unavoidable passage through which every person — staff, visitors, veterinarians, delivery drivers who need access, government officials — must physically pass to cross from Zone 1 to Zone 3.
Its design must accomplish three simultaneous objectives:
- Require complete removal of Zone 1 clothing and footwear before entry to Zone 2/3
- Prevent Zone 1 contamination (removed clothing, footwear) from contacting Zone 2/3 clean areas
- Prevent Zone 3 clothing or footwear from being taken into Zone 1
Minimum Viable Changing Room Design (Small Commercial Farm)
Plan dimensions: 2.5 m × 3.0 m minimum — sufficient for 2 people to change simultaneously without crowding.
The dirty bench / clean bench system (core design feature):
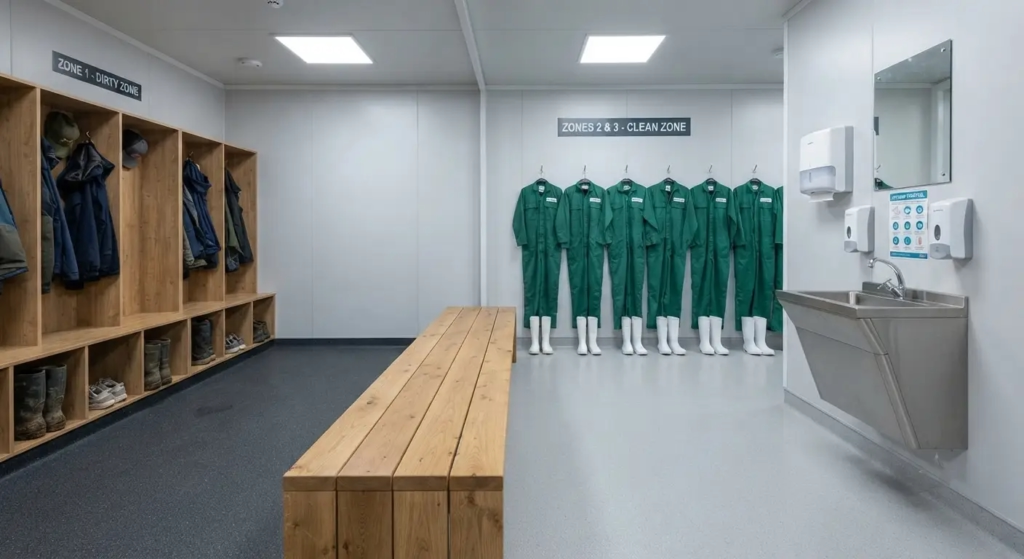
The room is divided — physically or by a clearly marked line on the floor — into a dirty half (Zone 1 side) and a clean half (Zone 2/3 side). A bench runs the width of the room at the division line.
- Dirty half (entry side): Where Zone 1 clothing and footwear are removed. A rack or hook system for hanging personal clothing. A sealed dirty footwear zone (ideally a raised platform or tray that prevents Zone 1 boot mud from spreading across the floor). A sealed plastic bin or bag for wet or heavily soiled clothing.
- The bench: The physical boundary that a person sits on to change footwear — with dirty boots on the dirty-side floor and clean farm boots on the clean-side floor. The act of swinging legs over the bench while sitting constitutes the boundary crossing.
- Clean half (exit side): Where farm clothing and footwear are put on. Clean farm boots in individual labeled holders or a boot rack. Farm overalls on labeled hooks. Clean hand washing station.
- Exit door to Zone 2/3: Opens outward toward the clean side — physically impossible to open from the dirty side without walking around the bench, which makes the re-contamination pathway obvious rather than accidental.
- Entry door from Zone 1: Opens inward from the dirty side — independently accessible from Zone 1 without requiring entry to the clean half.
Essential fixtures:
- Hand washing station with running water, soap dispenser, and single-use paper towels or hand dryer, positioned on the clean side after the bench crossing
- Mirror — allows staff to verify they have completed the uniform change correctly
- Pegboard or labeled hooks for each staff member’s dedicated farm clothing (name-labeled overalls and boots prevent cross-contamination between staff members’ clothing)
- Ventilation — the changing room generates moisture from wet boots and clothing; adequate ventilation prevents the mold growth that contaminates stored farm clothing
Floor specification: Non-slip tile (epoxy-coated concrete is functional but smooth tiles allow easier mopping). The dirty half floor should have a slightly raised threshold or lip at the entry door to prevent external surface water from flowing in during rain. The entire floor should slope to a central drain.
Construction cost estimate: XAF 1,500,000–3,500,000 (USD 2,500–5,833) for a basic functional changing room with the bench system, floor tiling, plumbing, and fixtures for a small commercial farm.
Shower Block (Higher-Security Operations)
For operations requiring the highest biosecurity level — PRRS-positive herds implementing strict internal biosecurity, farms adjacent to ASF-risk areas, or farms where staff work patterns create elevated contact risk with other pig populations — a shower-in/shower-out protocol replaces the changing room-only transition with a requirement for a full-body shower before accessing Zone 3.
Design: The shower block sits between Zone 1 and Zone 3, with three physically distinct compartments:
Compartment 1 (Dirty side): Undressing area with dirty clothing storage; entry from Zone 1 only. No connection to Compartment 3 without passing through Compartment 2.
Compartment 2 (Shower): One or more shower stalls with hot and cold water, soap and shampoo dispensers. No Zone 1 clothing or footwear enters this compartment. No Zone 3 clothing enters this compartment. The shower is the physical demarcation between the two contamination states.
Compartment 3 (Clean side): Dressing area with farm clothing and footwear. Exit to Zone 3 only. No connection back to Compartment 1 without passing back through the shower.
Shower protocol: The mandatory shower protocol is the most effective single personnel biosecurity measure available because it removes surface contamination from skin and hair — the largest surface areas on the human body — that clothing change alone does not address. It also creates a behavioral friction that discourages casual zone crossing and reinforces the significance of the biosecurity transition.
Construction cost estimate: XAF 3,000,000–7,000,000 (USD 5,000–11,667) for a three-compartment shower block with hot water provision, appropriate to a medium-scale commercial operation.
Visitor Management Infrastructure
The Visitor Reception Point
Visitors who do not need access beyond Zone 2 — feed company sales representatives, government officials conducting administrative functions, potential customers, neighbors — should be received at a designated visitor reception point within Zone 2, never in Zone 3.
The visitor reception facility:
- Positioned near the Zone 1-Zone 2 entry gate — accessible without requiring the visitor to navigate through operational farm areas
- A simple covered seating area with a hand sanitizer station at minimum; a small office or meeting room at the more developed end
- A visitor register: dated, with visitor name, organization, contact details, purpose of visit, and the critical question — “Have you visited another pig farm, pig market, or slaughterhouse in the past 48 hours?
- A visitor footbath at the Zone 1-Zone 2 entry: a large flat tray (minimum 60 cm × 90 cm, 10 cm deep) filled with disinfectant (1% Virkon or equivalent) that visitors step through before crossing from Zone 1 to Zone 2 — not a substitute for the full changing room protocol, but a minimum barrier for Zone 2 entry
Visitor Protocols by Category
Category A — No Zone 3 access required (business/administrative visitors):
- Sign the visitor register
- Step through the entry footbath
- Meet in the visitor reception area (Zone 2)
- No additional biosecurity requirement
Category B — Zone 3 access required but low risk (familiar regular farm visitors with known biosecurity practices):
- Sign the visitor register
- Complete the full changing room transition (personal clothes to farm visitor overalls and boots)
- Accompanied by farm staff throughout Zone 3 visit
- Complete reverse transition on exit
Category C — Zone 3 access required, high risk (veterinarians, government inspectors, auditors, persons who have visited other farms recently):
- Sign the visitor register (with recent farm contact declaration)
- If shower block is available: complete full shower-in protocol
- If only changing room available: complete full changing room transition plus disinfectant hand wash
- Farm-designated companion throughout Zone 3 visit
- Complete reverse transition (shower-out or changing room exit) on departure
- 48-hour post-visit contact: where a veterinarian or inspector subsequently identifies disease concerns at another farm they visit after leaving yours, notification enables heightened surveillance of your herd
Category D — Delivery personnel requiring vehicle entry to Zone 2:
- Vehicle stops at the entry gate
- Driver steps through the vehicle entry footbath before approaching the farm building or offloading point
- Driver does not enter Zone 3 under any circumstances
- Offloading supervised by farm staff who manage the transition of goods from the delivery vehicle into Zone 2 storage
Part 5: The Vehicle Control System
Vehicle Wash Station Design
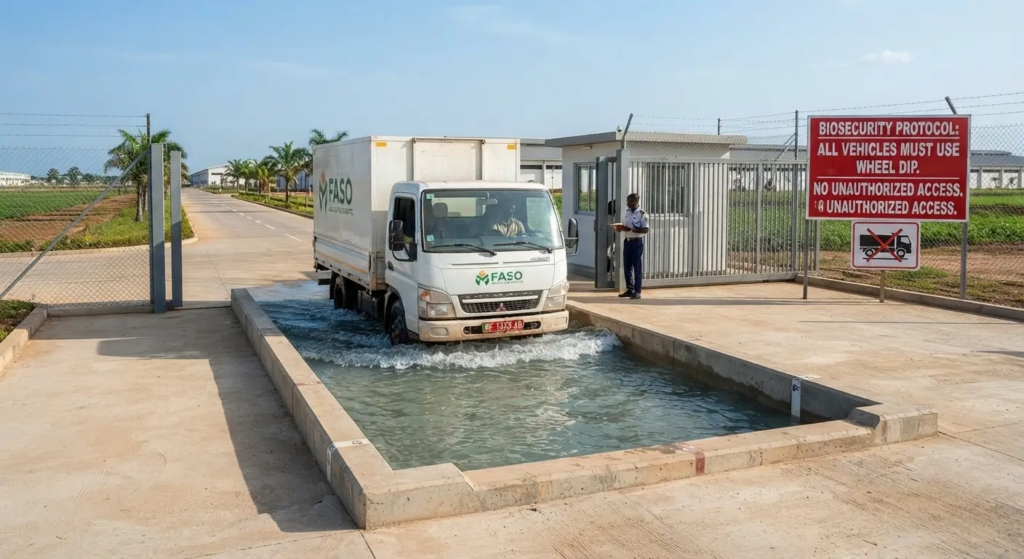
The vehicle wash station (also called the wheel dip or vehicle disinfection station) is the physical infrastructure that controls the passage of vehicles from Zone 1 to Zone 2, ensuring that wheel and undercarriage contamination from the external environment is addressed before the vehicle proceeds onto Zone 2 surfaces.
Wheel dip bath — minimum specification:
- Concrete construction, recessed into the driveway so vehicle wheels pass through without the vehicle needing to stop
- Minimum dimensions: 6 meters long (ensuring all four wheels of a standard delivery truck complete a full revolution in the disinfectant, maximizing contact between tire surface and active disinfectant) × 3 meters wide × 20 cm deep
- Lined with disinfectant: 2% Virkon S, 4% sodium carbonate, or equivalent broad-spectrum disinfectant appropriate for vehicle wheel disinfection
- Disinfectant replenished and replaced: minimum daily (organic matter from wheels rapidly inactivates disinfectant; heavily used entry points may require twice-daily replenishment)
- Drainage: sealed to prevent disinfectant from flowing into Zone 1; drain to a collection sump
Construction cost for a functional wheel dip: XAF 1,200,000–2,500,000 (USD 2,000–4,167)
The limitation of wheel dips: Wheel dips address wheel and lower tire sidewall contamination. They do not address undercarriage contamination, cab floor contamination from the driver’s boots, or the vehicle body surfaces that may carry dust, manure splatter, or organic material from previous farm visits. For high-risk vehicles (live animal transporters, manure removal vehicles, vehicles that have recently visited other farms), a more comprehensive wash approach is required.
High-pressure vehicle wash station (for high-risk vehicles):
A dedicated concrete pad at the Zone 1-Zone 2 boundary, with a high-pressure water connection, drain collection, and access to disinfectant spraying equipment, allows comprehensive washing of all vehicle surfaces — wheels, undercarriage, body panels, wheel arches — before the vehicle proceeds to Zone 2.
This facility is essential for live animal transport vehicles that may carry highly concentrated infectious material from their previous loads. The minimum protocol:
- Vehicle parks on the wash pad in Zone 1
- High-pressure water wash of all exterior surfaces — wheels, wheel arches, undercarriage, loading compartment
- Disinfectant spray applied to all washed surfaces (1% Virkon or equivalent)
- 20-minute minimum contact time before vehicle proceeds through the entry gate
- Vehicle then crosses the wheel dip bath as the final entry step
Wash station construction cost: XAF 2,000,000–5,000,000 (USD 3,333–8,333) for a functional high-pressure wash station with appropriate drainage
House-Level Footbaths and Internal Zone Transitions
The House Entry Footbath
Within Zone 3, each production building has its own footbath at the entry point — creating an additional biosecurity transition between the Zone 3 general area (through which all Zone 3 traffic passes) and the specific building’s internal environment.
Footbath design specifications:
| Dimension | Specification | Rationale |
|---|---|---|
| Length | Minimum 50–60 cm | Ensures both boots make full contact with the disinfectant surface |
| Width | Minimum 50 cm | Wide enough for normal gait through without stepping around |
| Depth | 10–15 cm | Provides adequate disinfectant depth to cover boot sole and lower side |
| Construction | Rubber mat or molded plastic tray (preferred) or concrete | Rubber and plastic allow removal for thorough cleaning; concrete is permanent but harder to clean completely |
| Position | Immediately at the building threshold — not 30 cm inside the entry | Foot contact with contaminated ground before the footbath negates the purpose |
Disinfectant selection and management:
| Disinfectant | Concentration | Change Frequency | Notes |
|---|---|---|---|
| Quaternary ammonium compound (e.g., Tego, Virukill) | Per manufacturer (typically 0.5–1%) | At minimum daily; more frequently in wet conditions or heavy traffic | Rapidly inactivated by organic matter — active solution must be clear/lightly colored; dark or murky solution is spent |
| Iodophor (iodine-based disinfectant) | 0.5–1% iodine | Daily or when color fades from amber to clear | Color change provides visible indication of activity — clear solution = spent product |
| Sodium carbonate (washing soda) | 4% solution | Every 2–3 days (more stable than ammonium compounds) | Effective against foot and mouth disease virus — important where FMD is a concern |
The most common footbath failure: Using the correct disinfectant at the correct concentration on Monday, and having a spent, heavily diluted footbath by Thursday because it was not changed on Tuesday or Wednesday. A footbath that looks like disinfectant but has been inactivated by the organic matter tracked through it is providing only the psychological comfort of appearing to function — it is not providing actual disinfection. Daily change is the minimum discipline; visual assessment of disinfectant activity at each use is the operational check.
Internal footbath placement within buildings: In buildings with multiple rooms (farrowing house with separate farrowing rooms, weanling buildings with AIAO rooms), individual room doorways should also have footbaths — maintaining the room as a sub-zone within the building, so that disease in one room cannot spread to adjacent rooms via the stockperson’s boots.
The Dead Animal Pickup Point
Why Carcass Collection Requires a Specific Zone Interface Design
Dead animal collection — by the carcass disposal truck, by the rendering vehicle, or by the municipal waste collection service — requires the carcass to cross from Zone 3 (where it originated) to Zone 1 (where the collection vehicle operates) without the collection vehicle entering Zone 2 or Zone 3, and without farm staff who have crossed into Zone 3 returning to Zone 2 contaminated from carcass handling.
The dead animal collection bay design:
A dedicated enclosure — typically a roofed, concrete-floored bay approximately 2 m × 2 m — positioned at the Zone 1-Zone 2 boundary, accessible from the Zone 2 side for farm staff delivering carcasses and accessible from the Zone 1 side for the collection vehicle without the collection vehicle entering Zone 2.
- The bay has two separate access points: a gate or door from Zone 2 (for staff bringing carcasses from Zone 3 through Zone 2) and a gate or access from Zone 1 (for the collection vehicle to remove carcasses)
- The bay floor is sealed concrete sloped to a drain connected to the farm’s liquid waste management system — preventing carcass fluids from flowing toward Zone 2 or entering groundwater
- A lime bin or lime application point inside the bay — carcasses stored temporarily in the bay should be covered with agricultural lime to reduce odor and fly attraction between deposition and collection
- The bay is locked or secured on the Zone 1 side when not actively being accessed for collection — preventing unauthorized access to the carcass storage point from Zone 1 (relevant for biosecurity, security, and wildlife access prevention)
The collection frequency principle: Carcasses should not accumulate in the dead animal bay for more than 24–48 hours before collection. Beyond this period, the bay becomes a significant fly breeding point and odor source, and the biosecurity value of the contained bay is degraded by the increasing pathogen load it contains. Establish a regular collection schedule with the carcass disposal service provider that prevents extended accumulation.
Signage, Training, and System Maintenance
Why Infrastructure Alone Is Insufficient
The dirty-clean zone system is a physical structure — but physical structures require human agents to operate them correctly. The footbath that is not changed daily, the changing room bench that is bypassed by staff in a hurry, the visitor log that is not maintained, the wheel dip that is used without active disinfectant — each of these represents a gap between the infrastructure’s designed function and its actual function in operation.
Signage Standards
At every zone transition point, install permanent, weatherproof signage:
- Zone 1-Zone 2 entry gate: “RESTRICTED ACCESS — BIOSECURITY ZONE. ALL VISITORS REPORT TO RECEPTION BEFORE ENTERING.”
- Changing room entry (Zone 1 side): “STOP. CHANGE CLOTHING AND FOOTWEAR BEFORE PROCEEDING. DO NOT ENTER WITHOUT COMPLETING TRANSITION.”
- Changing room exit (Zone 2/3 side): “YOU ARE NOW IN THE CLEAN ZONE. DO NOT RETURN TO THE DIRTY ZONE WITHOUT NOTIFYING THE FARM MANAGER.”
- Each house footbath: “STEP THROUGH FOOTBATH BEFORE ENTERING. DISINFECTANT MUST BE ACTIVE — CHECK COLOR/FRESHNESS.”
- Visitor reception area: “VISITOR LOG — ALL VISITORS MUST SIGN IN INCLUDING DATE, CONTACT DETAILS, AND RECENT FARM VISITS.”
Signage should be in the languages used by farm staff — in bilingual areas of Cameroon, both French and English are appropriate; in Nigeria, including major regional languages alongside English improves compliance from all staff categories.
Staff Training Protocol
The biosecurity system should be introduced to every new staff member before they begin work — not after they have already made several trips through the farm without proper transition procedures. The induction training covers:
- Why the system exists: The specific financial consequences of a disease introduction on this farm (using the ASF and PRRS cost estimates from biosecurity guidance in this series) — staff who understand the cost of the problem they are preventing are more motivated to comply than those who perceive biosecurity as an administrative procedure
- How each facility is used: A supervised walkthrough of the changing room transition, footbath stepping procedure, visitor log completion, and any other facility-specific protocol
- The reporting responsibility: Every staff member should understand that noticing a biosecurity gap — a malfunctioning footbath, a visitor who bypassed the changing room, a vehicle that entered Zone 3 without going through the wash station — is something they are expected to report to the farm manager, not ignore
Maintenance Schedule
| Facility | Daily | Weekly | Monthly |
|---|---|---|---|
| Entry footbath (Zone 1-Zone 2) | Replace disinfectant; clean tray | Scrub tray; inspect for structural damage | Verify disinfectant concentration with test kit |
| House-level footbaths | Replace disinfectant; remove debris | Scrub tray; clean floor around tray | Verify disinfectant concentration |
| Wheel dip bath | Replace disinfectant; clear debris | Clean concrete surfaces | Check structural integrity of concrete |
| Changing room | Wipe bench surfaces; mop floor | Wash farm overalls stored in room; clean boot racks; check soap/paper towel supply | Full deep clean of all surfaces; inspect for structural maintenance needs |
| Shower block (where applicable) | Clean shower cubicles; replenish soap/shampoo | Full deep clean; check water heater function | Plumbing inspection |
| Dead animal bay | Check that lime is covering carcasses; inspect for drainage function | Full clean following any collection event | Structural inspection |
The maintenance log: Record every maintenance event in a biosecurity maintenance log — date, facility, action taken, and who performed it. This log is the documentary evidence that the biosecurity system is being actively maintained rather than merely existing as a structural feature. It is also the primary diagnostic tool when the system’s function is questioned following a disease event — the maintenance record either confirms that the system was functioning correctly (pointing the investigation elsewhere) or reveals the maintenance gap that created the entry pathway.
Designing for Different Farm Scales
Small Farm (Under 20 Sows or 200 Finisher Pigs)
The complete system described above is the target — but at small scale, the capital cost must be proportional. The minimum viable physical system for a small commercial farm:
- Perimeter fence: Essential regardless of scale — a farm without a defined, fenced perimeter cannot control who or what enters
- Simple changing room with bench system: A basic 2.5 m × 3.0 m structure with the dirty-side/clean-side bench design, hand washing station, and labeled clothing and boot storage. This is the most essential single biosecurity structure on any pig farm
- Basic wheel dip bath: A wheel dip at the entry gate is achievable within a modest budget and addresses the primary vehicle contamination route
- House footbaths: Plastic tray footbaths at each building threshold — low capital cost, high biosecurity value
Total minimum capital cost for small farm system: XAF 3,000,000–6,000,000 (USD 5,000–10,000) for a small farm implementing the minimum viable zone system, exclusive of the perimeter fence which may already exist.
Medium Farm (20–100 Sows or 200–1,000 Finisher Pigs)
Full implementation of the complete system described, with:
- Changing room with shower block for higher-risk entry events
- High-pressure vehicle wash station for live animal transport vehicles
- Dedicated dead animal collection bay
- Visitor reception facility
- House-level footbaths at every building and between rooms in multi-room buildings
Total capital cost: XAF 10,000,000–20,000,000 (USD 16,667–33,333) for complete zone infrastructure
Large Farm (100+ Sows or 1,000+ Finisher Pigs)
Full implementation plus:
- Mandatory shower-in protocol for all Zone 3 entry
- Separate staff zones within the production area (farrowing staff separated from finishing staff, who are separated from feed mill staff)
- Automated vehicle wash systems at the entry point
- Electronic visitor management system (keycard access at zone transitions that creates an automatic log of all zone entries and exits)
- On-site biosecurity manager responsible for daily system function verification
Summary
The dirty-clean zone system converts biosecurity from a behavioral expectation into a physical reality — infrastructure that makes the biosecurity transition unavoidable for every person and vehicle that crosses the farm boundary, rather than a protocol that depends on individual compliance under the pressures of operational convenience and time constraint.
The four critical infrastructure elements — the personnel changing room with its bench-based dirty-to-clean transition, the vehicle wheel dip or wash station at the entry gate, the house-level footbaths at each production building, and the dead animal collection bay at the Zone 1-Zone 2 boundary — address the specific contamination pathways that account for the majority of disease introductions in commercial pig production.
None of these structures requires sophisticated construction or imported materials. All can be built by local contractors from locally available concrete, tile, rubber, and standard plumbing components. The investment — XAF 3,000,000–6,000,000 for the minimum viable small farm system — represents a fraction of the cost of a single PRRS introduction (XAF 39,500,000) or ASF outbreak (XAF 76,000,000) that the system is designed to prevent.
The difference between a farm that has biosecurity policies and a farm that has biosecurity infrastructure is the difference between a farm whose protection depends on whether everyone remembers the rules today, and a farm whose protection is built into the ground it stands on.
Build the structure. The structure enforces the behavior.