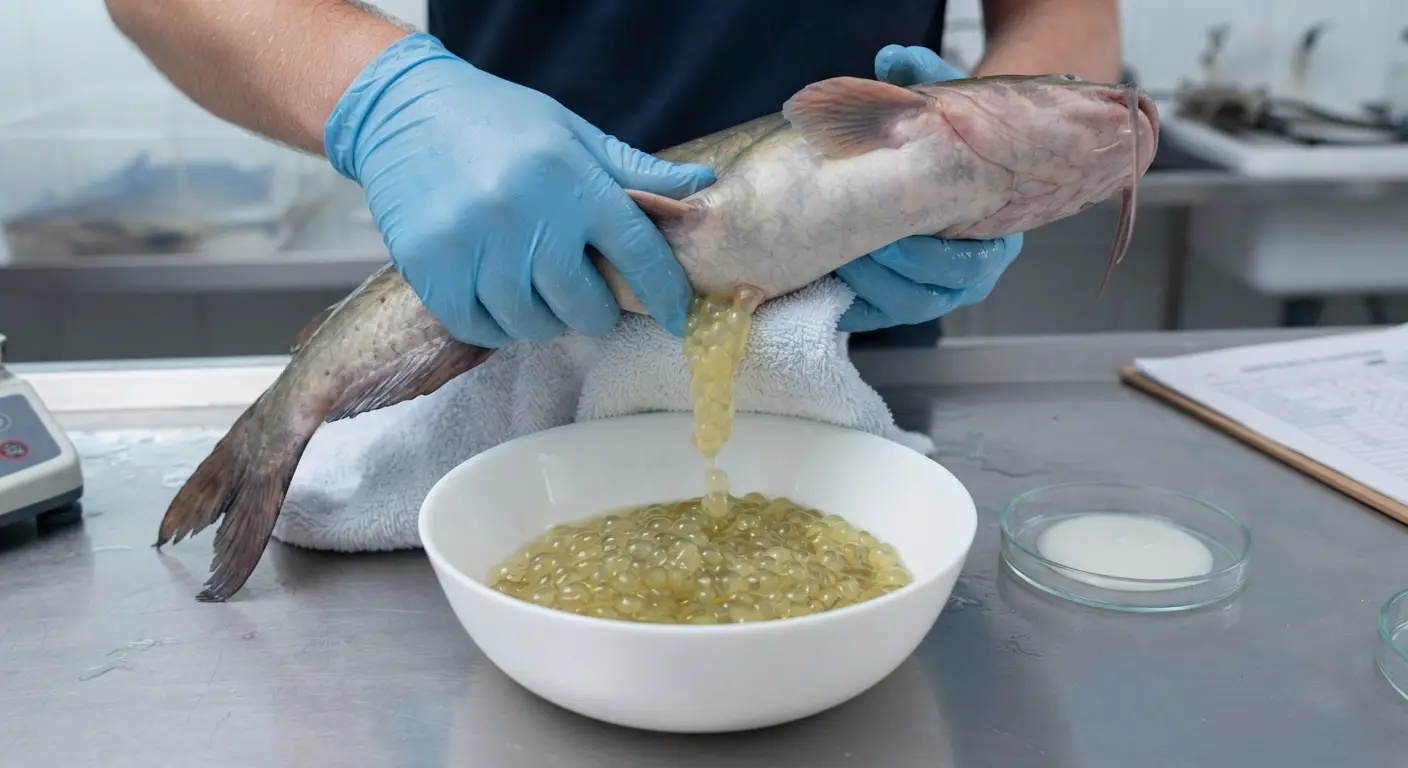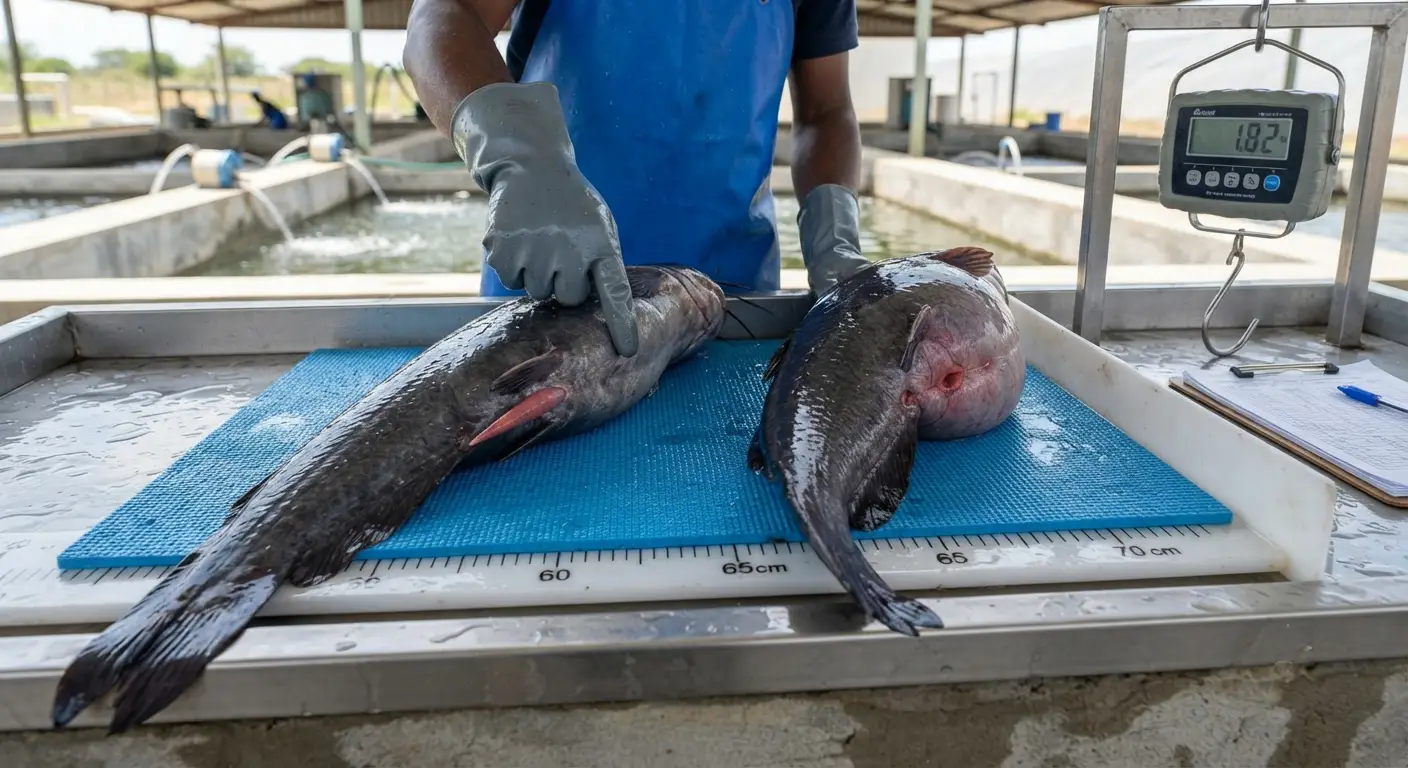
Larval rearing is the most technically demanding phase of commercial catfish production. The biological vulnerabilities of newly hatched catfish larvae — microscopic size, incomplete organ development, limited energy reserves, strong cannibalistic tendency from the moment they begin active feeding – combine with the narrow management windows within which interventions must occur to produce a phase where errors that would be minor at any other production stage are lethal. A first-feeding transition delayed by 24 hours beyond the critical window produces irreversible starvation in the larval cohort. A first-feeding particle that is 50% too large for the larvae’s mouth gape is as useless as no feed at all. A failure to grade the cohort within the first week of feeding allows the 20% of larvae that grow fastest to consume the 80% that grow more slowly.
The hatchery that manages these windows correctly, delivering the right feed at the right size at the right time, grading on schedule, maintaining appropriate water quality for larvae that are far more sensitive than grow-out fish, and monitoring the behavioral indicators that distinguish a healthy, feeding cohort from one that is about to crash — achieves survival rates from hatch to 1 g fingerling of 40–65% in commercial practice. The hatchery that manages poorly achieves 10–25% survival from the same initial egg numbers, with higher feed cost per surviving fingerling and longer rearing cycles.
This guide covers the complete larval rearing protocol for Clarias gariepinus from hatch through to the 1 g fingerling stage — organized chronologically through the developmental timeline, with specific management requirements at each stage.
The First 24–48 Hours Post-Hatch — The Yolk Sac Period
What Is Happening Biologically
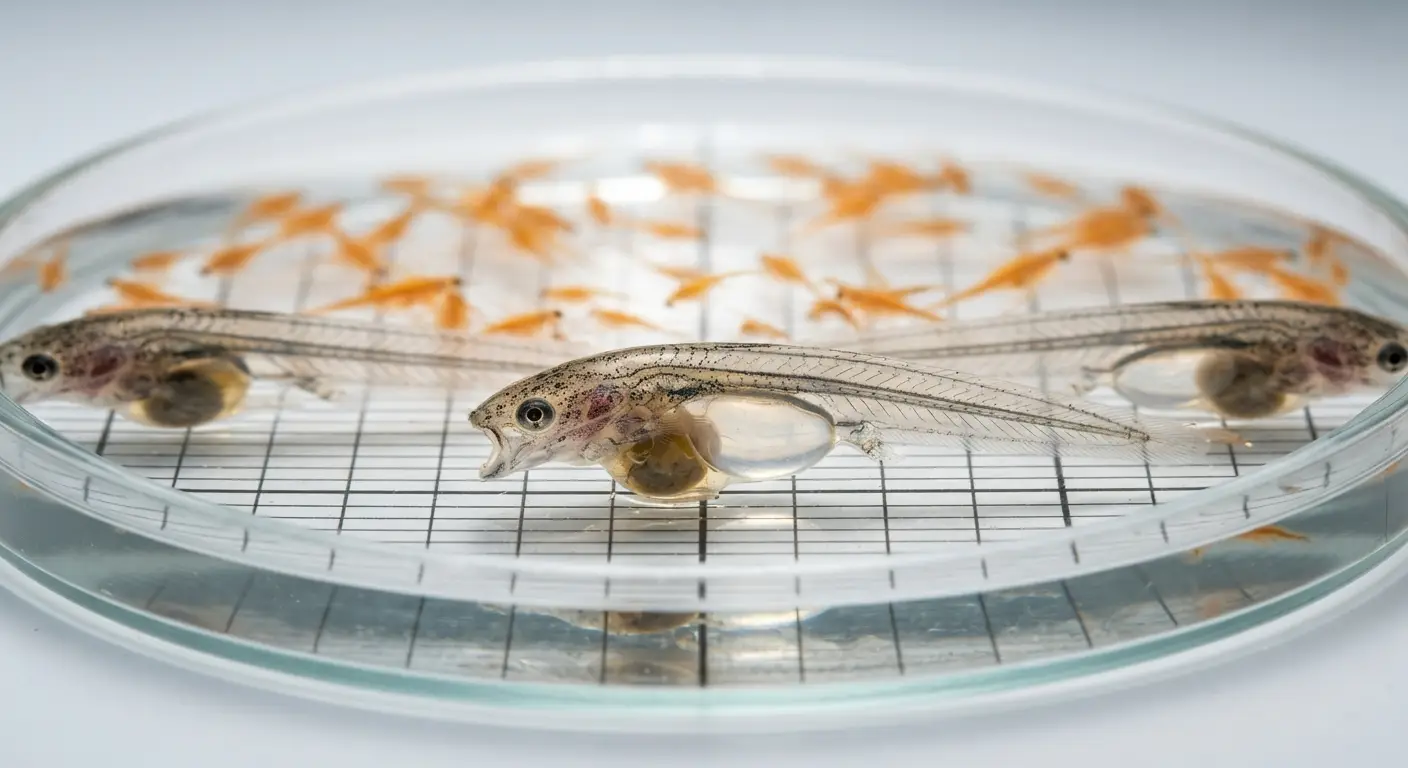
Newly hatched African catfish larvae (0–24 hours post-hatch at 28°C) are approximately 4–6 mm in length, almost transparent, and carry a prominent yolk sac that provides all their nutrition for the first 2–4 days of life. During this period:
- The larvae are negatively phototactic — they actively avoid light and seek dark, sheltered locations
- They are not capable of active swimming beyond weak, occasional movement
- The digestive system is not yet functional for exogenous food processing
- The swim bladder has not yet inflated — larvae cannot achieve neutral buoyancy
- The gills are not yet fully functional — the larvae rely on cutaneous (skin surface) gas exchange and the limited reserves in their yolk sac for energy
Management during the yolk sac period:
No feeding is required or beneficial — larvae cannot process external food and premature feeding attempts introduce bacterial load without nutritional benefit.
Water quality: Maintain high water quality standards during the yolk sac period — DO above 6 mg/L, temperature stable at 27–29°C, TAN below 0.3 mg/L, NO₂ below 0.05 mg/L. The physiological stress of suboptimal water quality during this critical developmental period increases first-feeding mortality even if water quality improves before feeding begins.
Density during yolk sac period: Newly hatched larvae can be held at relatively high density — 50,000–100,000 larvae per square meter in shallow tanks with gentle aeration — because they are not yet feeding and not yet demonstrating cannibalistic behavior. This allows efficient use of hatchery space during the period when space efficiency matters most.
Light management: Maintain dim or dark conditions — bright light causes the larvae to aggregate at the tank perimeter or bottom in dense masses that can cause mortality from crowding and localized oxygen depletion.
The Larval Rearing Tank Setup
Tank specifications for larval rearing:
- Shallow rectangular tanks (20–30 cm water depth): the shallow depth allows larvae to access the water surface for air-breathing as the suprabranchial organ begins developing, and ensures that aeration creates gentle, even water movement throughout the water column
- Smooth, non-porous tank walls: rough surfaces damage the larvae’s delicate skin and mucus during the frequent contact that occurs during aggregation behavior
- Dark coloring or covered exterior: reduces light penetration that causes stress-induced aggregation
- Fine-mesh screens on all inlets and outlets: openings must be small enough to prevent larvae from passing through — a mesh of 0.3–0.5 mm opening is appropriate for newly hatched larvae
Aeration during yolk sac period:
- Very gentle diffused air aeration — enough to maintain DO above 6 mg/L and prevent temperature stratification, but not enough to create currents that exhaust the larvae
- Position diffusers at tank corners rather than center, creating gentle circulation rather than direct turbulence on the larvae
Day 3–5 — The First Feeding Transition
The Most Critical Management Event in Larval Rearing
The transition from yolk sac nutrition to exogenous feeding is the single highest-mortality-risk event in the entire catfish production cycle. The window during which first feeding must be initiated is narrow — typically 12–24 hours from the point of yolk sac absorption to the point of irreversible starvation. Larvae that miss this window do not survive; they cannot be rescued by food provision after the window has closed.
Identifying the correct first-feeding moment:
The yolk sac is visible as a yellowish to orange mass on the ventral surface of the larva. Monitor the yolk sac daily by examining 20–30 larvae under a magnifying lens or dissecting microscope:
- Day 2–3 post-hatch (28°C): Yolk sac still prominent, occupying 30–50% of the larva’s visible ventral mass. No feeding yet.
- Day 3–4: Yolk sac visibly reduced. Larvae beginning to show more active swimming behavior — beginning to orient upward and horizontally rather than the passive sinking-floating of Day 1–2. Swim bladder inflation beginning (some larvae visible near the water surface). Begin food preparation.
- Day 4–5: Yolk sac nearly absorbed — barely visible as a small remnant. Larvae actively swimming horizontally and vertically. Mouth gape opening and closing actively. This is the first feeding window — initiate feeding immediately.
Visual confirmation of feeding initiation:
Within 2–4 hours of correct first food presentation, larvae that are feeding successfully will show a visibly orange-yellow intestinal tract (visible through the transparent larval body) from the ingested food mass. Larvae that remain transparent in the gut region are not feeding — either the food particle size is wrong, the food concentration in the water is insufficient, or the larvae have missed the optimal feeding window.
First Feed Selection and Preparation
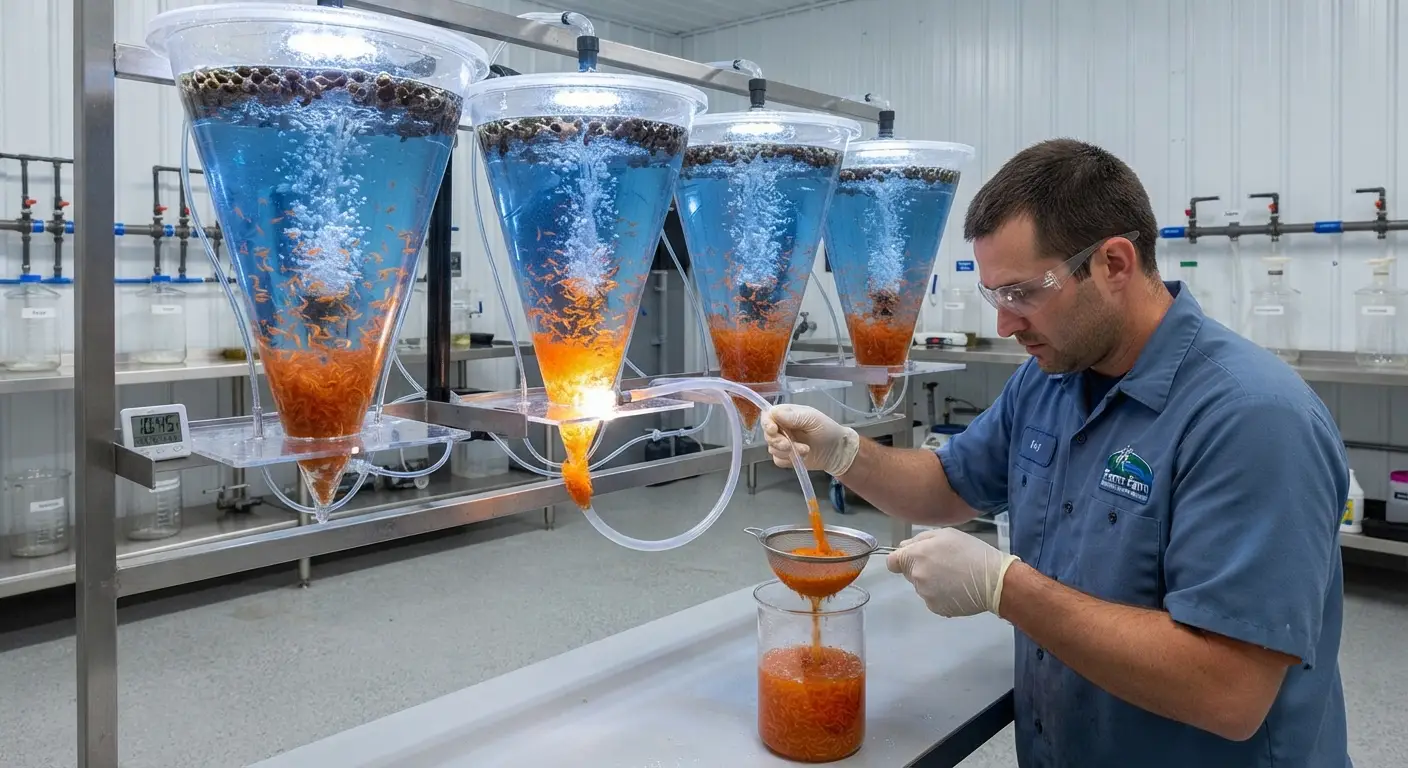
Artemia nauplii (brine shrimp larvae): The gold standard first feed for African catfish larvae — newly hatched Artemia nauplii (typically 400–500 μm in length, 150–200 μm diameter) match the mouth gape of first-feeding catfish larvae almost exactly, provide excellent nutritional value (high protein, intact cell phospholipids, digestible in the immature larval gut), and their active swimming behavior provides a visual feeding stimulus that triggers the predatory strike response of catfish larvae.
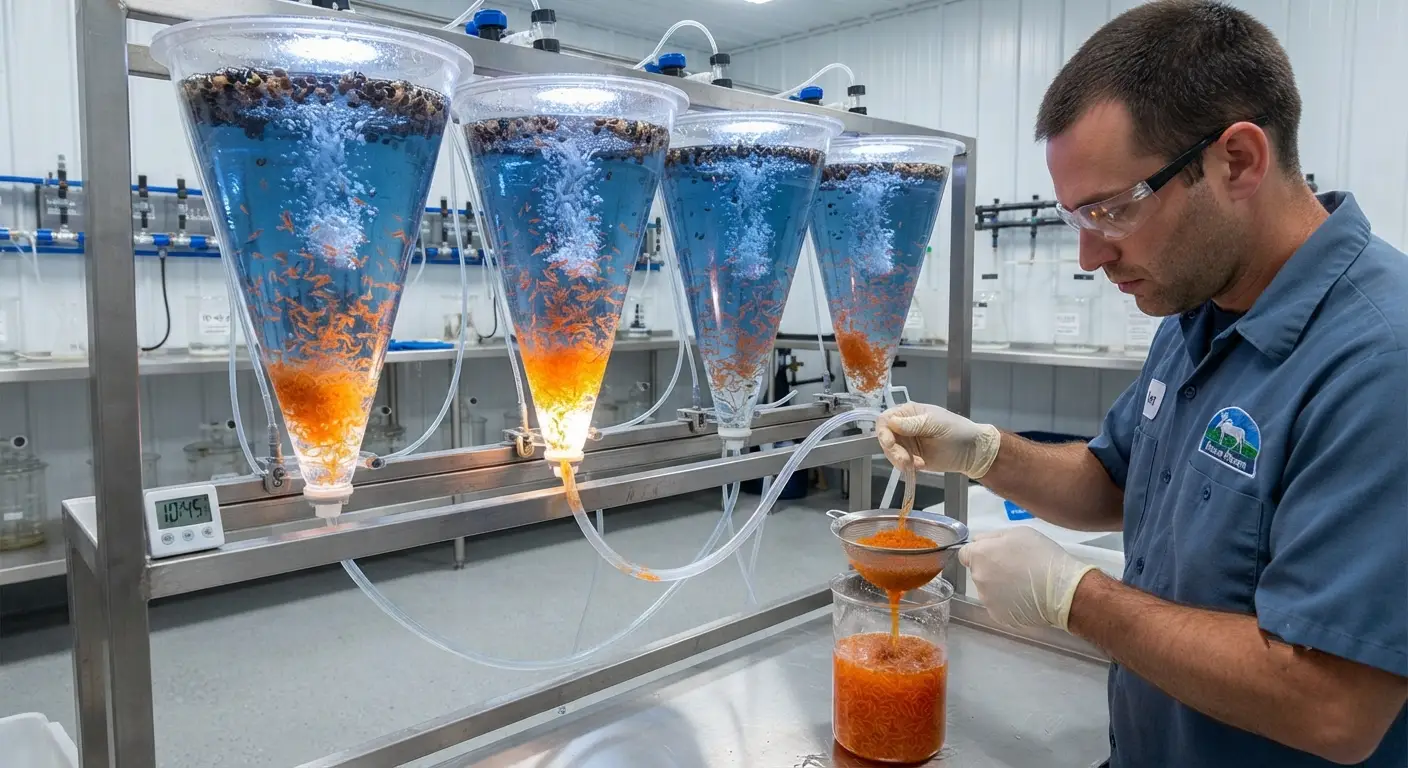
Artemia nauplii production protocol:
- Purchase Artemia cysts (dried eggs) from a reputable supplier — cyst viability (hatching rate) varies significantly between batches and suppliers; test a sample before committing to a large purchase
- Prepare 1–2 days before first feeding is expected: dissolve 30–35 g NaCl per liter of water to create artificial seawater (or use commercial marine salt)
- Add Artemia cysts at 2–4 g per liter of seawater in an incubation vessel (conical flask or specialized Artemia hatcher) with vigorous aeration and at 26–28°C
- After 24 hours of incubation, nauplii hatch — they are positively phototactic and will accumulate at the surface near a light source, allowing collection by pipette or siphon
- Separate nauplii from unhatched cysts and shells by harvesting through a 100 μm mesh screen, rinsing with fresh water, and presenting in the larval tank
Feeding rate: Provide nauplii at a concentration sufficient that larvae encounter food frequently — approximately 2–5 nauplii per mL of tank water is a practical target. This requires calculating the tank volume and feeding enough nauplii to achieve this concentration.
Feeding frequency: Feed every 2–4 hours during the daylight period for the first 5–7 days. African catfish larvae at this stage have extremely small digestive tract volumes — they must feed frequently to maintain adequate caloric intake.
Alternative first feeds:
Micro-encapsulated artificial diets (100–200 μm particle size): Available from aquaculture feed suppliers as starter diets specifically formulated for larval fish. Less expensive than Artemia for large-scale operations and nutritionally complete — but lack the movement stimulus that makes Artemia so effective at triggering the feeding response in naive first-feeding larvae. Some operations use a combination: Artemia to initiate feeding behavior, with micro-diets added alongside from Day 5 onward to begin the diet transition.
Rotifers (Brachionus species): Smaller than Artemia nauplii (150–250 μm), making them appropriate as a first feed for species with smaller mouth gapes than catfish. For Clarias gariepinus larvae with relatively large mouth gapes, Artemia nauplii are the preferred first feed — rotifers are appropriate for larval fish with smaller mouth gapes.
Egg yolk suspension: Hard-boiled egg yolk passed through a fine sieve to create a fine particle suspension — an accessible emergency substitute when Artemia is unavailable. Nutritionally adequate as a bridge, but particles are non-motile (no movement stimulus) and very rapidly degrade water quality from the high organic load of uneaten yolk particles. Not recommended as a primary first feed for production operations.
Days 5–15 — Early Larval Development and Diet Transition
Growth During the Early Larval Period
At 28°C with adequate Artemia feeding, African catfish larvae grow rapidly:
- Day 5 (first feeding): 5–7 mm length, approximately 2–3 mg body weight
- Day 7: 8–12 mm length, 5–10 mg body weight
- Day 10: 12–18 mm length, 15–30 mg body weight
- Day 14: 18–25 mm length, 40–80 mg body weight
This rapid growth means that the feed particle size appropriate on Day 5 is already too small by Day 10 — the diet must be transitioned upward in particle size as the larvae grow.
Transitioning to Formulated Micro-Diets
Beginning on Day 5–7, gradually introduce formulated micro-pellet starter diets alongside the Artemia nauplii:
Particle size progression:
- Days 5–8: 100–300 μm micro-powder or micro-encapsulated diet alongside Artemia
- Days 8–12: 300–500 μm micro-crumble, replacing 50% of Artemia ration
- Days 12–18: 500–800 μm crumble, completely replacing Artemia nauplii
- Days 18–25: 800 μm–1.0 mm crumble or small pellet, fully formulated starter
Transition approach: The transition from live Artemia to formulated feed is a behavioral learning process — larvae that have been feeding actively on moving Artemia nauplii must learn to recognize and ingest the non-moving formulated diet particles. This transition is gradual and best achieved by reducing the Artemia proportion while maintaining the formulated diet concentration rather than abruptly switching from one to the other.
Nutritional Requirements During the Larval Period
Larval African catfish have the highest dietary protein requirement of any production stage:
- Crude protein: 45–55% during Days 1–14 (Artemia nauplii provide approximately 55–60% protein on a dry weight basis — well within this range)
- Crude lipid: 12–18%, with emphasis on essential phospholipids and DHA/EPA for neural and membrane development
- Digestible energy: 18–22 MJ/kg
- Essential amino acids: as per ideal protein ratios established for African catfish, with lysine typically the first limiting amino acid
When selecting a commercial larval starter diet, verify that the crude protein content is in the 45–50% range — general-purpose aquaculture starter feeds at lower protein levels (35–40% CP) are not adequate for catfish larval development.
Water Quality Management During Larval Period
Larvae are substantially more sensitive to water quality parameters than grow-out fish — the thresholds established for production fish represent wider tolerances than larval fish can withstand:
| Parameter | Larval Target | Grow-Out Comparison |
|---|---|---|
| DO | Above 7 mg/L continuously | Above 5 mg/L |
| TAN | Below 0.2 mg/L | Below 1.0 mg/L |
| Unionized NH₃ | Below 0.01 mg/L | Below 0.02 mg/L |
| Nitrite | Below 0.05 mg/L | Below 0.3 mg/L |
| pH | 7.0–8.0 | 6.5–8.5 |
| Temperature | 27–29°C ± 0.5°C | 26–30°C ± 2°C |
| Turbidity | Low (below 10 NTU) — clear water | Moderate acceptable |
The feeding-water quality interaction: The high feeding frequency required for larval nutrition (every 2–4 hours) generates substantial waste — uneaten Artemia nauplii die and decompose, uneaten formulated feed dissolves into the water. Both contribute rapidly to ammonia accumulation and turbidity. The water exchange rate in larval tanks must be high enough to maintain water quality despite this continuous organic loading.
Water exchange in larval tanks:
Minimum 30–50% daily water exchange in larval tanks during active Artemia feeding. This is substantially higher than the 15–20% typical of grow-out concrete tanks — reflecting the much higher feed density per unit water volume in small larval tanks and the much lower ammonia tolerance of larvae.
Siphoning bottom waste: Daily gentle siphoning of tank bottoms removes dead Artemia, uneaten feed particles, and fecal material that otherwise contribute to ammonia load. Use a fine-tipped siphon with a mesh-covered inlet to prevent larvae from being siphoned out with the waste.
The Cannibalism Management Protocol
When Cannibalism Begins and Why
Cannibalism in Clarias gariepinus larvae begins as soon as the larvae achieve sufficient size and mobility to successfully pursue and ingest smaller conspecifics — typically from approximately Day 7–10, when the fastest-growing individuals in the cohort have reached 15–20 mm while the slowest-growing remain at 8–12 mm.
The 3–5% of a larval cohort that grows fastest in the first week will typically be 50–80% larger than the slowest-growing 20% by Day 10 — and a fish that is 50% larger than its tank-mate can successfully cannibalize it. Left unmanaged, this creates a positive feedback loop: the fastest growers eat the slowest growers, grow even faster from the additional nutrition, eat more of the remaining smaller fish, and so on. In an ungraded cohort, cannibalism mortality can consume 50–80% of the larvae between Day 10 and Day 21 — survival rates that are typically attributed to “disease” or “poor hatchery conditions” when they are actually the result of a fixable management failure.
Grading Protocol for Cannibalism Prevention
First grading: Day 7–10
This is the most critical grading event in the larval rearing cycle — catching size divergence at its earliest practical point, before significant cannibalism has occurred:
- Drain the larval tank partially (to approximately 10 cm water depth) for easier collection
- Collect all larvae by gentle netting or sweeping into a concentrated area of the tank
- Pass larvae through a series of grading screens or grading boxes with progressively smaller slot sizes:
- Large size class (above 15 mm): separated into tank A
- Medium size class (10–15 mm): separated into tank B
- Small size class (below 10 mm): separated into tank C
- Restock each size class into a separate tank at the appropriate stocking density for that size (see stocking density guidance below)
Grading frequency:
| Larval Age | Grading Required |
|---|---|
| Day 7–10 | First grading — most critical |
| Day 14–16 | Second grading — sizes have diverged again within each class |
| Day 21–25 | Third grading — transition to fingerling stage |
| Thereafter | Monthly during fingerling grow-out |
Stocking density by size class following grading:
| Size Class | Body Weight | Target Stocking Density |
|---|---|---|
| First-feeding larvae | 2–5 mg | 50,000–80,000/m² |
| Early larvae (Day 7) | 10–30 mg | 20,000–40,000/m² |
| Late larvae (Day 14) | 50–150 mg | 5,000–10,000/m² |
| Early fingerling (Day 21) | 0.2–0.5 g | 1,000–3,000/m² |
| Advanced fingerling (0.5–1.0 g) | 0.5–1.0 g | 500–1,000/m² |
The behavioral indicator for grading need:
Before grading is scheduled, observe the tank twice daily for behavioral signs of cannibalism beginning. Signs that cannibalism has started:
- Fish chasing and pursuing smaller fish in the tank
- Fish with distended abdomens disproportionate to their feeding history (belly full of consumed tank-mates)
- Sudden reduction in total count of visible larvae in daily observation
- Larvae with bite marks or partial body damage
When these signs appear, bring the grading schedule forward — do not wait for the scheduled date if active cannibalism has already begun.
Feeding Protocol from Day 15 to the 1 g Fingerling Stage
Days 15–25: The Weaning to Formulated Feed Period
By Day 15, larvae that have been graded and well-managed should be entirely transitioned to formulated micro-crumble or small pellet feeds (0.5–1.0 mm), with Artemia nauplii fully discontinued. The feeding protocol during this period:
Feed particle size: 0.8–1.2 mm crumble or pellet — sized to approximately 25–30% of the fish’s mouth gape width
Feeding frequency: Every 2–3 hours during daylight (6:00 AM to 8:00 PM); one overnight feeding optional in auto-fed systems
Daily feed rate: 15–25% of biomass per day (much higher rate than for grow-out fish, reflecting the larvae’s extremely fast growth rate relative to body weight)
Estimated daily ration calculation:
For a tank holding 5,000 larvae averaging 0.2 g each: Total biomass = 5,000 × 0.2 g = 1,000 g Daily feed at 20% of biomass = 200 g Per feeding (every 2 hours, 7 feedings): 200 ÷ 7 = approximately 29 g per feeding
Distribute this amount evenly across the tank surface — not in one pile that creates a feeding frenzy in one location while fish at the tank perimeter receive nothing.
Days 25–40: Transition to Nursery Phase (0.2 g to 1 g)
As larvae pass through the 0.2 g threshold, the most acute larval management challenges — first feeding, early cannibalism, diet transition — are past, and the fish enter a phase more similar in management requirements to the fingerling nursery stage. However, the following management priorities remain:
Continued grading: Every 10–14 days until the cohort reaches 1 g uniform average weight. Size variation that was 50% at Day 10 should have narrowed to 15–20% by Day 30 if grading has been consistently applied.
Diet transition: Progressively increase pellet size as fish grow — a fish of 0.5 g is appropriately feeding on a 1.0–1.5 mm pellet; a fish of 1.0 g on a 1.5–2.0 mm pellet.
Water quality management: As fish size increases and feeding rate per unit volume increases, water exchange rate must increase proportionally to maintain TAN below 0.5 mg/L. Transition from the high-frequency partial exchange management of the larval stage to a daily water exchange rate of 30–50% of tank volume at the 1 g fingerling stage.
Stocking density transition: As fish reach 0.5 g average, thin to 500–800 fish per m² — providing adequate space for feeding behavior without the density-related stress that suppresses growth and increases disease susceptibility.
Monitoring Larval Health and Development
The Daily Count and Behavioral Assessment
Unlike grow-out fish where daily observation is sufficient monitoring, larval management requires more frequent behavioral assessment because mortality events develop more rapidly and the behavioral warning signs precede mortality by shorter windows:
Every 4 hours during the first 10 days:
- Observe fish distribution in the tank — larvae distributed evenly across the tank surface are generally healthy; larvae all aggregated at the bottom, or all at the surface, indicate stress
- Observe feeding response — when Artemia or formulated feed is added, do the larvae actively pursue and ingest it? (Gut contents visible through the transparent body wall)
- Observe for any inactive, listing, or spiral-swimming individuals — these indicate neurological stress from water quality or oxygen issues
Daily assessment:
- Count the number of dead larvae collected during bottom siphoning — expressed as a percentage of the estimated population provides the daily mortality rate
- Target: below 1–2% per day during Days 1–7; below 0.5% per day during Days 7–25
- Above 3% daily mortality warrants immediate investigation
Weekly development assessment (microscopy):
- Examine 20–30 larvae under a dissecting microscope
- Check for skeletal deformities (curved spine, missing fins, fused finrays) — deformity rate above 5% indicates a broodstock nutrition issue (usually essential fatty acid or vitamin C deficiency) or incubation problem
- Check for external parasites (Trichodina, Gyrodactylus) — treat immediately if detected
- Assess developmental stage against the expected timeline for the current age and temperature
Nutritional Deficiency Signs in Larvae
Several nutritional deficiencies produce characteristic visible signs in larvae that can be identified with basic observation or microscopy:
Spinal deformities (lordosis, scoliosis, kyphosis — curvature of the spine): Vitamin C deficiency in the broodstock or the larval diet. The collagen framework of the vertebral column requires vitamin C for correct formation — vitamin C-deficient diets produce larvae with curved or deformed spines visible from Day 10–14 onward. Correct by ensuring broodstock diet contains a minimum of 1,000 mg/kg vitamin C and larval starter diet contains a minimum of 2,000 mg/kg (vitamin C degrades rapidly in stored feed — use stabilized forms and fresh feed).
Poor swim bladder inflation (larvae unable to achieve neutral buoyancy, sinking to tank bottom): Essential fatty acid deficiency (DHA/EPA) in the larval diet or from Artemia nauplii of poor quality (Artemia cyst quality varies significantly — low-quality cysts produce nauplii with poor DHA/EPA profiles). Correct by sourcing high-quality Artemia cysts with documented DHA content; consider HUFA-enriched Artemia using commercial enrichment products applied for 6–12 hours before feeding.
High early mortality with no pathogen detected: Often indicates egg or larval quality issues from broodstock nutritional deficiency rather than disease — investigate broodstock diet and spawning record for this female’s recent history.
The Hatchery Water Quality System
Why the Hatchery Requires a Dedicated Water Treatment System
The water quality standards for larval rearing are substantially more stringent than for grow-out fish — and the continuous high water exchange rates required to maintain those standards mean that the water supply system for the hatchery must be able to deliver large volumes of consistently high-quality water.
Hatchery water supply treatment requirements:
Chlorine removal: Municipal water supply or surface water treated with chlorine must have the chlorine completely removed before use in larval tanks — even 0.1 mg/L chlorine residual causes significant larval mortality. Dechlorination by sodium thiosulfate addition (10 mg/L sodium thiosulfate neutralizes 1 mg/L chlorine) or activated carbon filtration is mandatory for municipal water sources.
Temperature stabilization: The hatchery water supply should ideally be at a stable temperature within 1°C of the larval tank target — water significantly cooler or warmer than the tank water causes thermal shock when exchange water is added. A mixing system that blends cold supply water with warm water to achieve target temperature before delivery to larval tanks addresses this.
Pathogen reduction: UV sterilization of the incoming water supply reduces the pathogen load in exchange water — particularly important in larval systems where the pathogens that cause mass mortality in post-first-feeding larvae (Columnaris disease, Aeromonas infections) are waterborne and introduced through incoming water.
Fine filtration: A 50–100 μm filter on the incoming water supply removes particles that could compete with the first feed for the larvae’s attention, and removes zooplankton that could consume Artemia nauplii before the larvae encounter them.
Survival Rate Benchmarks and Economic Implications
Expected Survival Rates by Hatchery Management Quality
| Management Category | Hatch to Day 7 | Day 7 to 1 g Fingerling | Overall Hatch to 1 g |
|---|---|---|---|
| Poor (no grading, incorrect first feed, poor water quality) | 40–60% | 15–30% | 6–18% |
| Average (some grading, Artemia first feed, basic water quality) | 60–75% | 30–45% | 18–34% |
| Good (consistent grading, optimal first feed, good water quality) | 75–85% | 50–65% | 38–55% |
| Excellent (all protocols correct, continuous monitoring, RAS or high-exchange) | 85–92% | 65–80% | 55–74% |
The Financial Impact of Larval Survival Rate
For a hatchery producing 500,000 eggs per spawning event (a moderate commercial scale from 5–10 females):
At 15% overall hatch-to-1g survival: 75,000 fingerlings produced At 55% overall hatch-to-1g survival: 275,000 fingerlings produced
At XAF 50–100 per fingerling wholesale price, this difference represents XAF 10,000,000–20,000,000 per spawning event from the same number of eggs — the difference being almost entirely attributable to management quality rather than capital investment.
This calculation is the most compelling financial argument for investing in hatchery management quality — the feed, labor, and water quality investment required to move from “average” to “good” management is modest; the fingerling production gain from that investment is enormous.
Summary
Larval rearing from hatch to 1 g fingerling is the hatchery phase where management precision matters most and where the specific management protocols — correct first feeding timing, appropriate first feed particle size and type, strict grading schedule to prevent cannibalism, diet transition timed to developmental stage, and water quality maintenance to the more stringent larval standards — determine the survival rate that determines the financial productivity of the entire hatchery enterprise.
The developmental timeline at 28°C — yolk sac absorption by Day 3–5, first feeding initiation at Day 4–5, first grading at Day 7–10, Artemia phase through Day 12–15, full transition to formulated feed by Day 15–18, 1 g fingerling stage by Day 28–35 — provides the management calendar against which every intervention in this guide is scheduled. Understanding the biological reason for each intervention’s timing allows the hatchery manager to adapt the schedule appropriately when temperature differs from 28°C (warmer accelerates the timeline; cooler slows it) rather than applying the calendar mechanically regardless of actual conditions.
The next article covers fingerling sourcing, transport, and stocking density management — the transition from the hatchery to the grow-out production system that completes the supply chain from spawning to the commercial catfish farm.