The commercial catfish hatchery’s fundamental production event is induced spawning — the hormonal stimulation of broodstock fish to complete the final maturation and release of eggs and sperm that natural spawning would require specific environmental triggers to achieve. Clarias gariepinus does not spontaneously spawn in tanks or ponds regardless of how well it is conditioned — it requires rainfall, flooding, and specific nest construction that commercial hatchery conditions cannot practically replicate. Without hormonal induction, there is no spawning. Without spawning, there are no eggs. Without eggs, there are no larvae and no fingerlings.
Mastering induced spawning is therefore not an optional advanced technique for sophisticated hatcheries — it is the prerequisite for any fingerling production at all. A hatchery that induces spawning reliably, with high fertilization rates, optimal egg volumes per female, and predictable hatch timing, controls its own fingerling supply and can plan production against a reliable schedule. A hatchery whose induction results are variable — sometimes good, sometimes poor, with no systematic understanding of what determines the outcome — cannot plan production reliably and cannot scale.
The techniques in this guide are based on the standard protocols used in commercial African catfish hatcheries across West and Central Africa — simplified where simplification does not compromise results, specific where specificity determines success or failure. Every step in the induction-to-hatch sequence has defined optimal parameters. Understanding why each parameter matters allows the hatchery manager to adapt intelligently when conditions differ from the ideal, rather than following a protocol blindly and accepting poor results when something goes wrong.
The Biology of Final Oocyte Maturation and Ovulation
Why Natural Spawning Requires Environmental Triggers
Clarias gariepinus in the wild spawns during the onset of the rainy season — a time characterized by rising water levels from flooding, falling barometric pressure, reduced water temperature from rainfall input, turbid water conditions, and access to flooded terrestrial areas that provide spawning substrate and larval habitat. The fish’s reproductive system has evolved to respond to these environmental cues as confirmation that conditions are appropriate for spawning — ensuring that eggs are released into an environment where larvae have a chance of survival.
In captivity, none of these cues are present. A female African catfish conditioned to full oocyte development will hold her eggs in the ovary indefinitely rather than spontaneously ovulating — the final hormonal cascade that triggers ovulation (the surge in luteinizing hormone that causes follicular rupture and egg release) does not occur without the environmental trigger.
Hormonal induction bypasses this environmental dependency by directly delivering the signal that the female’s reproductive endocrine system is waiting to receive — either the LH signal itself (through injection of LH or an LH-like hormone) or the GnRH signal that causes the fish’s own pituitary to release LH (through injection of a GnRH analog).
The Hormonal Cascade of Induced Ovulation
Step 1: GnRH analog injection (or crude pituitary extract) → pituitary LH release
The hypothalamus of a conditioned female is already producing gonadotropin-releasing hormone (GnRH) — the signal that drives pituitary LH secretion. Adding an exogenous GnRH analog (such as buserelin, leuprolide, or D-Ala6-LHRHa) amplifies this signal, causing a surge in pituitary LH secretion that the natural environmental trigger would normally produce.
Alternatively, injection of crude pituitary extract (CPE) from mature catfish or carp donors bypasses the GnRH step entirely — the pituitary extract contains LH directly, which enters the fish’s circulation and acts directly on the ovarian follicles.
Step 2: LH acts on ovarian follicles → final oocyte maturation
The LH surge triggers the final biochemical events in oocyte maturation — the oocyte resumes and completes meiosis, the germinal vesicle breaks down (germinal vesicle breakdown, GVBD, is a microscopically observable event that indicates successful induction), and the oocyte undergoes final hydration (water uptake that increases egg diameter from approximately 1.0–1.2 mm to 1.2–1.5 mm in the mature egg).
Step 3: Follicle rupture and ovulation
The mature oocyte is released from the follicle into the ovarian cavity (ovulation). In spontaneous natural spawning, the fish would deposit the eggs — but in a commercial hatchery, the eggs are stripped manually before they have the opportunity to over-ripen in the ovarian cavity.
The over-ripening problem: Ovulated eggs have a limited window of fertilizability — in African catfish at 28°C, this window is typically 6–8 hours post-ovulation. Eggs that are not stripped and fertilized within this window undergo post-ovulatory aging — the zona pellucida hardens, the egg cytoplasm deteriorates. The eggs can no longer be fertilized even though they appear morphologically normal. Timing the stripping procedure correctly within the post-ovulation window is one of the most critical technical factors in successful induction.
Hormonal Agents for Induced Spawning
Option 1: Crude Pituitary Extract (CPE)
Source: Pituitaries from mature fish — typically carp (Cyprinus carpio) or catfish donors. The pituitary gland (located at the base of the brain) is harvested from mature, actively reproducing fish, preserved in acetone (for storage) or directly stored frozen, and dissolved in saline at the time of injection.
Dose for African catfish:
- Females: 2–3 mg dry pituitary per kg body weight, split into two injections
- First injection (priming dose): 0.5–1.0 mg/kg given 12 hours before the second injection
- Second injection (resolving dose): 1.5–2.0 mg/kg given at the main injection time
- Males: 1–2 mg/kg, single injection at the time of the female’s second injection
Advantages:
- Widely available from aquaculture supply stores in Nigeria, Cameroon, and across West Africa
- Historically proven in African catfish hatcheries — extensive experience with dosing protocols
- Lower cost per dose than synthetic GnRH analogs
Disadvantages:
- Variable potency between batches — the LH content of CPE varies with the reproductive condition of the donor fish and the quality of the extraction process; two batches at the same stated mg/kg dose may have very different actual LH contents and produce inconsistent results
- Disease transmission risk — pituitary extract from fish of unknown disease status could theoretically transmit pathogens; this risk is minimized by sourcing from known, healthy fish stocks
- Requires maintaining a pituitary extract supply with appropriate cold storage
Option 2: Synthetic GnRH Analogs (sGnRHa)
Common products: Ovaprim (sGnRHa + domperidone), Ovucryl (sGnRHa + metoclopramide), Dagin (D-Ala6-LHRHa), Receptal (buserelin acetate), and various regional commercial preparations.
Mechanism: GnRH analogs bind to the GnRH receptors in the pituitary and stimulate LH release — providing a more sustained and potent GnRH stimulus than the fish’s own hypothalamic GnRH. Dopamine antagonists (domperidone, metoclopramide) included in combination products reduce the dopaminergic inhibition of LH release that is strong in cyprinid fish but moderate in catfish — these dopamine antagonist components add modest benefit in Clarias compared to their larger benefit in carp induction.
Dose for African catfish:
Ovaprim (0.02 mg sGnRHa + 10 mg domperidone per mL):
- Females: 0.5 mL per kg body weight, single injection (or split into priming 0.1 mL/kg + resolving 0.4 mL/kg at 10–12 hour interval)
- Males: 0.2 mL per kg, single injection at the same time as the female’s resolving injection
D-Ala6-LHRHa (pure analog, without dopamine antagonist):
- Females: 10–20 μg per kg body weight
- Males: 5–10 μg per kg body weight
Advantages:
- More consistent potency than CPE — the active ingredient concentration is defined by the manufacturer and subject to quality control
- Lower risk of disease transmission
- Longer shelf life than CPE when stored correctly (typically 2–4°C for liquid preparations)
Disadvantages:
- Higher cost per dose than CPE
- Supply chain may be less reliable than CPE in some West African markets — verify local availability before committing to a GnRH-based induction program
Option 3: Human Chorionic Gonadotropin (hCG)
Source: Commercially produced pharmaceutical-grade hCG — the same product used in human reproductive medicine, available from pharmacies.
Mechanism: hCG has LH-like biological activity — it binds to LH receptors in fish ovarian follicles and stimulates the same maturation cascade that LH triggers. It acts directly on the gonad rather than through the pituitary.
Dose for African catfish:
- Females: 1,000–2,000 IU per kg body weight, single injection
- Males: 500–1,000 IU per kg, single injection at the same time
Advantages:
- Consistent potency (pharmaceutical-grade quality control)
- Widely available from pharmacies in most West African cities without specialized aquaculture supply chain
Disadvantages:
- Lower efficacy in inducing ovulation in African catfish than CPE or GnRH analogs — some females respond incompletely, producing partial stripping yields or requiring longer latency times
- Risk of antibody development with repeated use — fish that have been injected with hCG multiple times may develop antibodies that reduce its effectiveness in subsequent inductions
- More appropriate as an emergency alternative when CPE or GnRH analogs are unavailable than as the primary induction agent
The Injection Protocol
Equipment Required
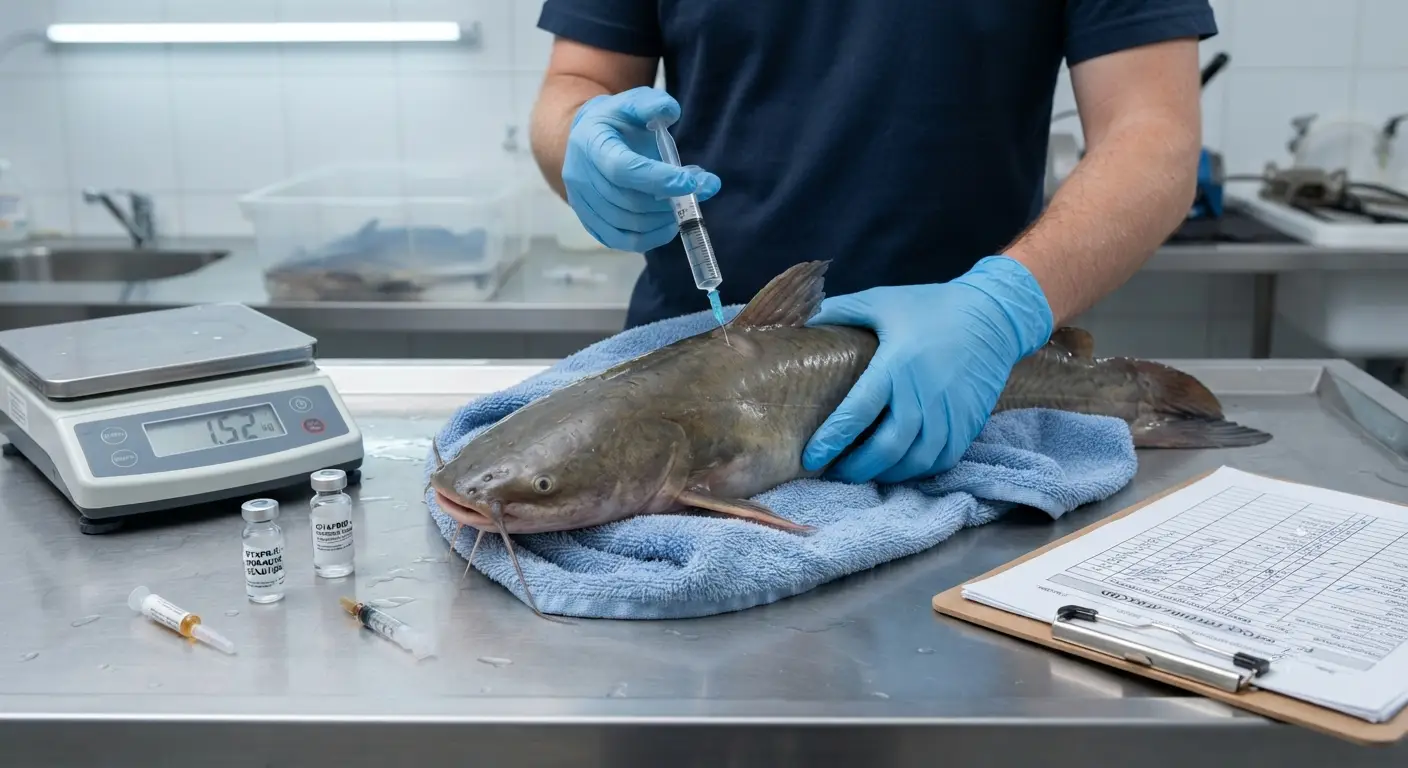
- Syringes: 1 mL or 2 mL syringes (insulin syringes with fixed needles work well for smaller volumes; standard Luer-lock syringes with 23–25 gauge needles for larger volumes)
- Needles: 23–25 gauge, 1.5 cm length
- Scale: accurate to 10 g for weighing fish to calculate hormone dose
- Hormone solution: prepared fresh immediately before injection at the calculated concentration
- Physiological saline (0.9% NaCl) as the diluent for hormone solutions
- Wet cloth or foam padding for fish restraint during injection
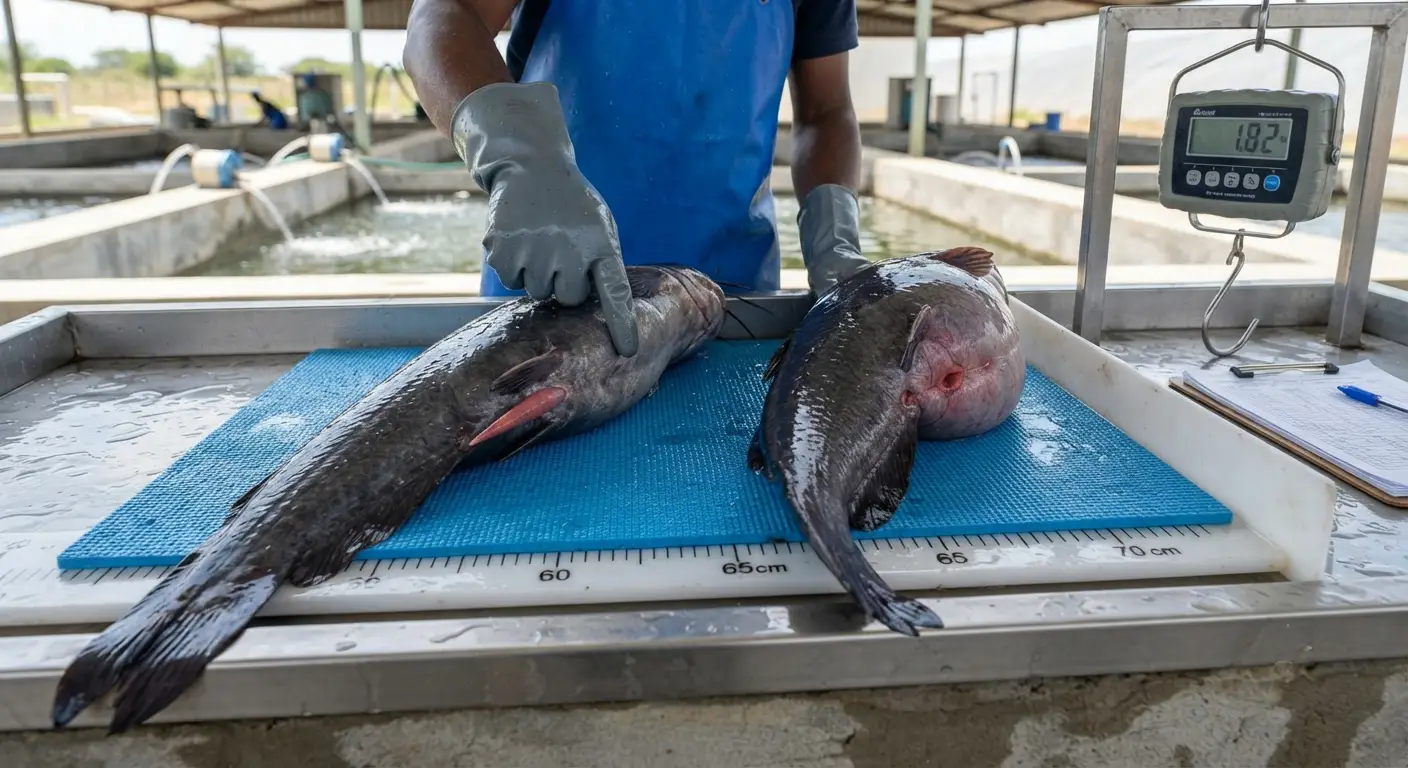
Fish Weighing and Dose Calculation
Before injection, weigh each fish individually and calculate the hormone dose for that specific animal:
Example dose calculation (Ovaprim, female, 1.2 kg):
- Target dose: 0.5 mL Ovaprim per kg body weight
- Required volume: 0.5 × 1.2 = 0.6 mL Ovaprim
- Dilute to total injection volume of 1.0–2.0 mL with 0.9% saline for easier measurement and delivery
Example dose calculation (CPE, female, 1.5 kg, resolving dose):
- Target dose: 2.0 mg/kg dry pituitary
- Required CPE: 2.0 × 1.5 = 3.0 mg dry pituitary weight
- Dissolve 3.0 mg of acetone-dried pituitary in 1.0–1.5 mL of 0.9% saline immediately before injection
The Injection Procedure
Injection site: Intramuscular injection in the dorsal body musculature — either:
- Into the dorsal epaxial muscle just below the dorsal fin, inserting the needle at approximately 45° angle directed cranially (toward the head), depth 1.0–1.5 cm
- Or into the neck region between the skull and the dorsal fin’s anterior edge (avoids the dorsal fin itself)
Avoiding the coelomic cavity: The injection must be into muscle tissue, not into the body cavity. Injection of hormone solution into the coelom does not produce the rapid systemic absorption of an intramuscular injection and results in unreliable, delayed hormone distribution.
Restraint: Wrap the fish briefly in a wet cloth or support it in a shallow container of water during injection. Work quickly to minimize handling time — each fish should be weighed, injected, and returned to its holding tank within 60–90 seconds where possible.
The two-injection protocol: The standard protocol for female African catfish uses two injections:
- First injection (priming dose): 25% of the total calculated dose, given 10–12 hours before the resolving injection. The priming dose sensitizes the pituitary to the resolving dose by beginning the LH response.
- Second injection (resolving dose): 75% of the total calculated dose, given 10–12 hours after the priming dose.
For male fish: Single injection at the same time as the female’s resolving dose, at the stated male dose. Males respond more rapidly than females and do not require the two-injection protocol.
Temperature and Latency Time
The time between the resolving injection and ovulation (latency time) is temperature-dependent — warmer water accelerates the hormonal response:
| Water Temperature | Approximate Latency Time (CPE/Ovaprim) |
|---|---|
| 24°C | 14–18 hours |
| 26°C | 12–14 hours |
| 28°C | 10–12 hours |
| 30°C | 8–10 hours |
Practical timing implication: If injections are given at 6:00 PM (resolving dose) with water at 28°C, stripping should be attempted beginning at approximately 4:00–6:00 AM (10–12 hours later). Planning the injection time to schedule stripping during daylight hours — when adequate light and staff are available — simplifies the stripping procedure.
Temperature control: Holding injected broodstock in water at a stable, known temperature allows latency time prediction. Placing injected fish in a tank where the water temperature fluctuates significantly makes latency time less predictable and increases the risk of missing the optimal stripping window.
The Stripping Procedure
When to Strip — Assessing Spawning Readiness
The correct moment for stripping is when the eggs have ovulated (been released from the follicle into the ovarian cavity) but have not yet undergone post-ovulatory aging. The signs of spawning readiness:
Abdominal distension and softness: In the 1–2 hours preceding the optimal stripping window, the female’s abdomen becomes noticeably more distended, and the tissue over the ovarian region feels softer to gentle palpation than before injection. The previously firm, tightly packed ovary has become a loose collection of free ovulated eggs.
Egg release test: Gently apply pressure to the posterior abdomen — if eggs flow freely from the genital opening with minimal pressure, the female is in the optimal stripping window. If no eggs emerge or only a few emerge with heavy pressure, either the female has not yet ovulated (check again in 1–2 hours) or the eggs are over-ripe and the zona pellucida has hardened.
The test strip: Before proceeding to full stripping, conduct a test strip — collect 10–20 eggs from a gentle preliminary squeeze and place them in a small amount of water. Examine their appearance: clear, turgid, slightly adhesive, consistent in size and color indicates optimal quality. Dark or opaque, irregular in size, or already beginning to separate from the membrane material indicates over-ripeness.
Equipment for Stripping
- Clean, dry bowls (ceramic, stainless steel, or glass — not plastic that may retain chemical residues) for collecting eggs
- Dry towels for drying the female’s ventral surface before stripping (water contact activates egg adhesiveness prematurely)
- Milt collection container (small clean dish or Petri dish) for male milt
- Clean water at the incubation temperature (28°C) for the fertilization activation step
- Feather or soft brush for mixing egg and milt (optional but helpful for even distribution)
- Timer
The Female Stripping Procedure
Critical requirement: keep eggs dry until milt is added
Water contact activates the eggs’ zona pellucida reaction (zona hardening and the cortical reaction) — eggs exposed to water before fertilization harden prematurely and cannot be penetrated by sperm. All surfaces that contact the eggs — the female’s abdomen, the collection bowl, any tools — must be completely dry during the stripping procedure.
Step-by-step stripping:
- Remove the female from holding and quickly dry her ventral surface with a clean towel
- Hold the fish firmly (one hand around the pectoral region, the other supporting the caudal peduncle) with the ventral surface facing up and the genital opening directed toward the collection bowl
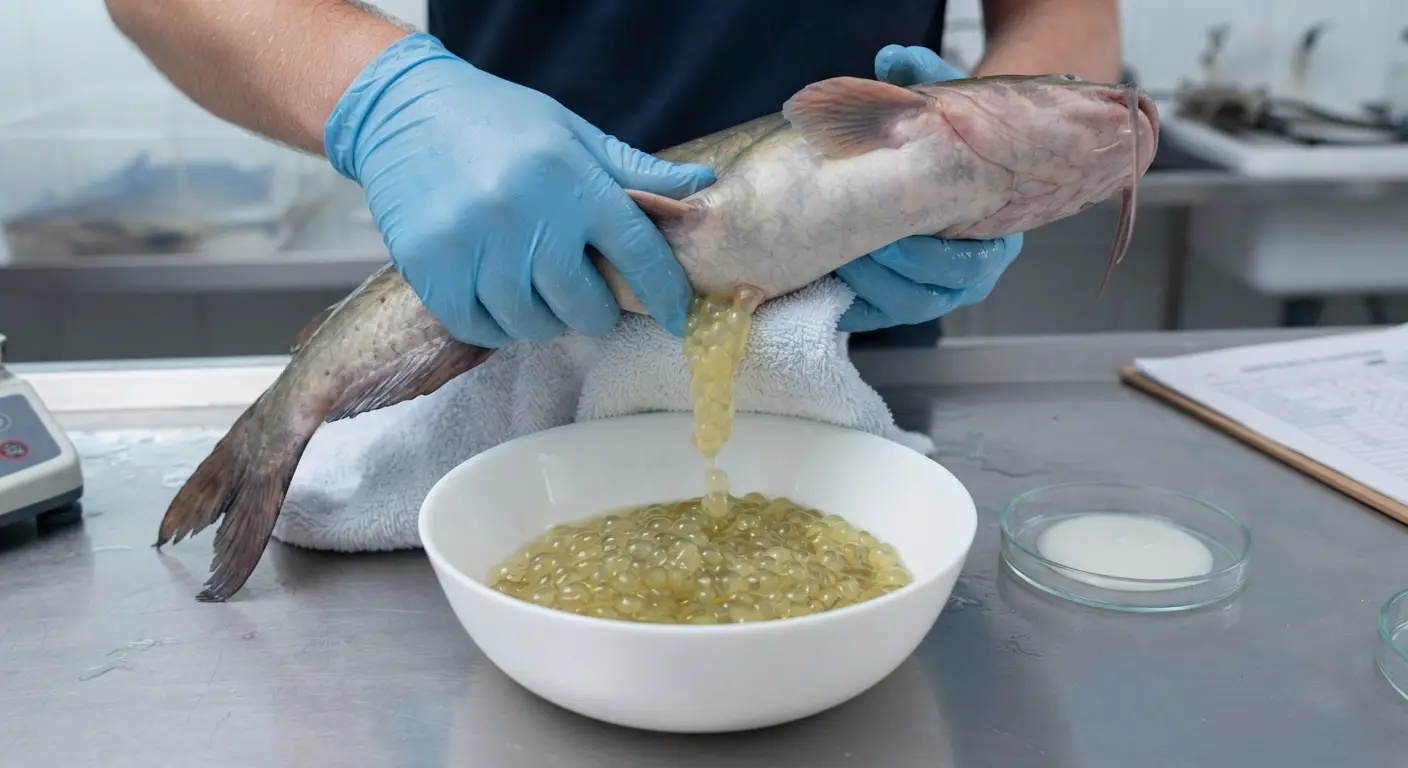
- Apply firm, even pressure from the anterior abdomen toward the genital opening, using a milking motion — the eggs should flow in a steady stream into the bowl
- Continue the milking motion, working from the anterior to posterior ovary, until egg flow stops or diminishes significantly
- Record the volume of eggs collected (in mL) from each female
What constitutes good stripping output:
A well-conditioned female African catfish of 1.0–1.5 kg at optimal ovulation typically produces 80,000–200,000 eggs (approximately 50–150 mL of egg volume). Females producing below 40,000 eggs (below 30 mL) may be incompletely ovulated, overripe, or in poor reproductive condition.
If eggs do not flow freely: Do not force stripping. If gentle to moderate pressure produces no egg flow, the female may not yet be at the optimal stripping window — return her to the holding tank for 1–2 additional hours before re-attempting. Forcing stripping on a pre-ovulation female produces poor-quality, incompletely matured eggs with very low fertilizability.
Milt Collection from Males
Milt collection proceeds in parallel with egg stripping — timing is important because milt must be added to eggs within a few minutes of stripping:
- Remove the male from holding and dry his ventral surface
- Apply gentle pressure toward the genital papilla — milt is released as a milky to cloudy white fluid
- Collect milt directly into a small clean dish or directly onto the stripped eggs
- Good quality milt is dense and milky white; poor quality milt is thin and watery or nearly clear
Milt volume required: A male of 800 g–1.5 kg typically produces 0.5–3.0 mL of milt per stripping. The required milt volume depends on sperm concentration and fertilization rate — fresh milt from a well-conditioned male can fertilize a large egg volume effectively with 0.1–0.3 mL per 50 mL of eggs when properly activated.
Multiple males: Using milt from 2–3 males per female (mixing the milt before addition to the eggs) provides genetic diversity in the resulting batch and ensures against low fertility from any single male — if one male’s milt is of poor quality, the others compensate.
Fertilization
The Fertilization Procedure
Equipment: Feather or soft brush, timer, clean bowl of water at 28°C
Step-by-step fertilization:
- Add the collected milt to the stripped eggs in the bowl — ensure the eggs are still dry
- Mix gently with a feather or soft brush to distribute the milt evenly through the egg mass
- After 60 seconds of dry mixing: add a small amount of clean water (approximately 10 mL per 50 mL of eggs) to activate the sperm
- Continue mixing gently for 2 minutes to ensure all eggs are exposed to activated sperm
- After 2–3 minutes total mixing: add a larger volume of clean water (approximately 200 mL per 50 mL of eggs) to complete sperm activation and dilution
The water activation sequence: Adding water in two stages — a small amount first to activate sperm, then a larger amount to complete the reaction — improves fertilization rate compared to adding all the water at once, which can dilute the milt so rapidly that sperm concentration at the egg surface is insufficient for maximum fertilization.
Fertilization assessment (4–6 hours post-fertilization): Examine a sample of eggs under a dissecting microscope or magnifying lens. Fertilized eggs will show clear signs of cell division (2-cell, 4-cell, or early blastula stage depending on incubation time and temperature). Unfertilized eggs remain as single, undivided cells and typically begin to appear opaque or whitish as they deteriorate.
Target fertilization rate: Above 80% of eggs showing successful fertilization is a good outcome. Below 60% fertilization indicates problems with milt quality, egg quality, or the fertilization procedure.
Egg De-Adhesion
African catfish eggs are adhesive immediately after fertilization — they stick to each other and to any surface, forming clumps that would reduce incubation efficiency and increase mortality from reduced water circulation to interior eggs.
De-adhesion treatment (tannin method):
Tannin (tannic acid) is the most widely used de-adhesion agent in African catfish hatcheries — it chemically neutralizes the adhesive properties of the egg’s outer membrane.
- Dissolve tannic acid powder in water at 2–5 g per liter (verify concentration with experienced local hatcheries — concentration varies with tannic acid source and regional practice)
- Immerse the fertilized eggs in the tannin solution for 30–60 seconds
- Rinse thoroughly with clean water (three to four rinse cycles) to remove all tannin residual
- Transfer to the incubation system
Alternative de-adhesion treatments:
- Wood ash suspension: traditional method using fine wood ash dissolved in water — produces a mildly alkaline solution that reduces adhesiveness; highly variable in composition and reliability
- Milk solution (dilute): casein proteins in dilute cow’s milk coat egg surfaces and reduce adhesiveness; less commonly used but accessible in locations where tannic acid is unavailable
- Clay suspension: fine clay particles coat egg surfaces — reduces adhesiveness without chemical treatment
Incubation
Incubation System Design
Fertilized eggs hatch in approximately 18–24 hours at 28°C in Clarias gariepinus — during this period they require:
- Stable water temperature (27–29°C optimal; fluctuations of more than ±1°C can impair development)
- Adequate dissolved oxygen (maintain above 6 mg/L throughout incubation)
- Gentle water circulation to prevent egg settling into anoxic zones
- Protection from mechanical disturbance that could damage the developing embryos
- Darkness or low light (developing embryos are photosensitive)
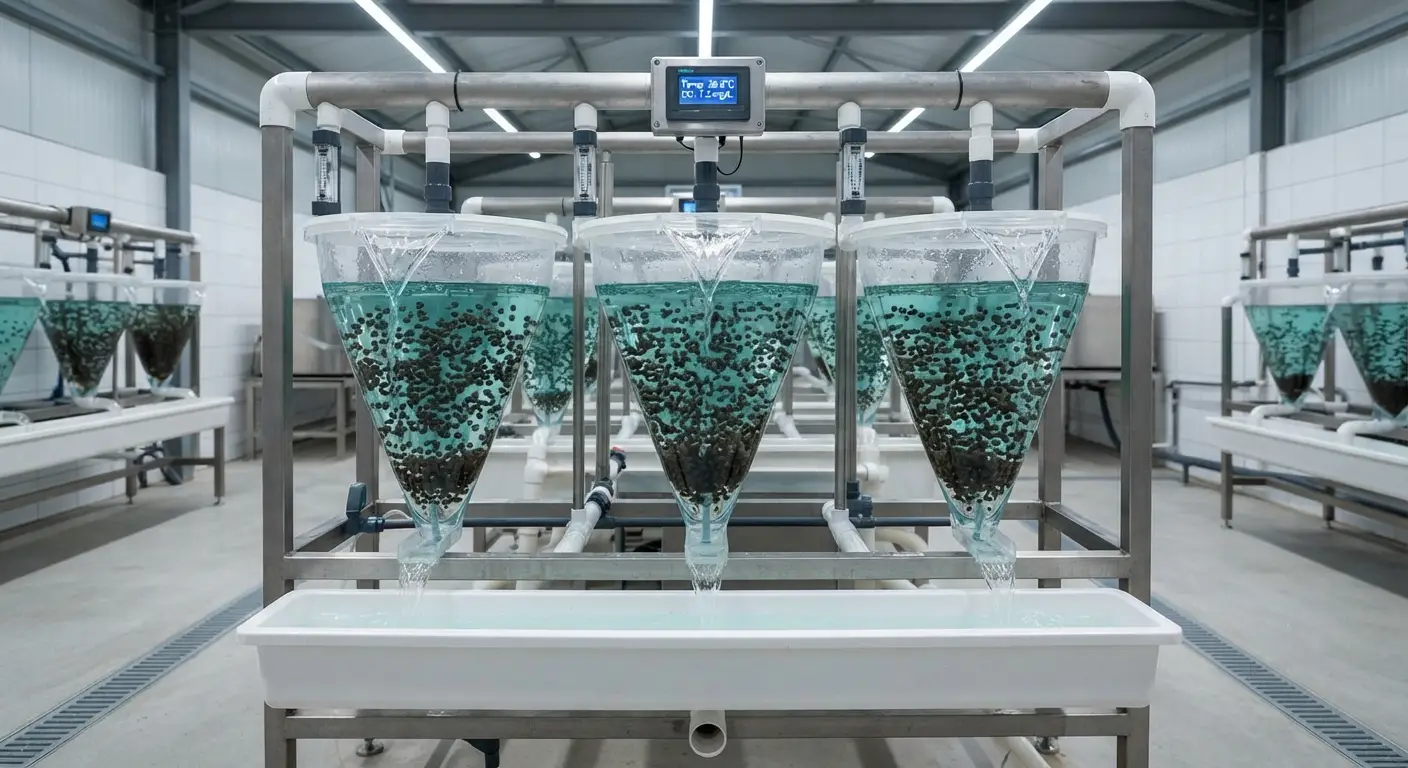
McDonald jar incubators:
The most widely used incubation system in commercial African catfish hatcheries — conical glass or clear plastic jars (1–5 liter capacity) through which water is pumped upward through the egg mass, maintaining the eggs in gentle suspension and providing continuous oxygenated water flow:
- Egg loading: approximately 500–1,000 mL of eggs per 4-liter jar (density appropriate for adequate water circulation through the egg mass)
- Upflow rate: adjusted to keep eggs gently suspended — eggs rising and falling in the current but not violently tumbled
- Water supply: clean, temperature-controlled water from the hatchery supply
Hapas in tanks:
Hapa nets (fine mesh net bags) suspended in aerated water tanks, with eggs incubated within the hapa. The surrounding tank water provides temperature stability and the hapa confines the eggs while allowing water circulation. Less precise water control than McDonald jars but simpler to set up with basic materials.
Egg tray incubation:
Flat trays with fine mesh bases, through which water circulates upward — used in some commercial hatcheries for larger-volume operations. Allows higher total egg volume per incubation unit but requires more precise flow rate management to maintain even water distribution.
Monitoring During Incubation
Every 2 hours during incubation:
- Check water temperature at the incubator inlet and outlet
- Check DO at the incubator outlet
- Observe egg mass — are eggs gently circulating? Is there any aggregation at the bottom indicating insufficient upflow?
Dead egg removal: Unfertilized eggs and eggs that die during development (from pathogens, physical damage, or fertilization failure) turn white and opaque. A significant proportion of white eggs within the incubating mass (above 20%) indicates either poor fertilization rate or infection. Remove white eggs by gentle siphoning or by increasing the upflow rate temporarily — the denser, heavier white eggs settle while fertilized eggs remain suspended.
Fungal infection management: Saprolegnia (water mold) infects dead eggs and can spread to live adjacent eggs. Treatments include brief formalin treatment (200–400 ppm for 15 minutes, with DO monitoring during treatment), methylene blue addition (2–3 ppm in the incubation water), or malachite green (where legally permitted — note that malachite green is banned in food fish production in many jurisdictions; verify local regulations before use).
Hatch Timing and Larval Collection
At 28°C, hatching begins approximately 20–22 hours post-fertilization and typically completes within 2–4 hours. The hatching larvae are initially positively buoyant (they float to the water surface briefly before becoming negatively buoyant) and then settle to the incubator bottom or tank base.
Larval collection:
After 90% or more of the batch has hatched (confirmed by observation of very few intact eggs remaining in the incubator), gently drain the incubator contents into a collection tank or transfer larvae by gentle siphoning. Count larvae by volumetric estimation — take a measured volume (100 mL), count the larvae in that volume, and multiply by the total volume to estimate total hatch number.
Target hatch rate: Above 75% of fertilized eggs hatching is a good outcome; above 85% is excellent. Below 60% hatch rate warrants investigation of incubation water quality, fungal infection, or egg quality at fertilization.
Common Induction Failures and Troubleshooting
Failure Type 1: No Ovulation Despite Injection
Possible causes:
- Female was not at the correct ovarian development stage (too early in vitellogenesis)
- Hormone dose was insufficient
- Hormone product was degraded (poor storage, expired)
- Water temperature too low, extending latency beyond the expected window
- Female was too stressed during or after injection (handling stress suppresses LH release)
Troubleshooting: Verify hormone product quality and storage conditions; conduct cannula test before the next induction attempt to confirm ovarian development stage; check water temperature stability in the holding tank post-injection.
Failure Type 2: Partial Stripping (Low Egg Volume)
Possible causes:
- Stripping attempted before full ovulation (some eggs still in follicles)
- Stripping attempted after the optimal window (early post-ovulatory aging)
- Female in poor nutritional condition (limited oocyte development despite apparent maturity)
- Previous spawning cycle too recent (insufficient conditioning time between spawning events)
Troubleshooting: Check latency time against temperature-predicted window; review conditioning period duration; check inter-spawning interval in the individual female’s record.
Failure Type 3: Low Fertilization Rate
Possible causes:
- Milt exposure to water before eggs were ready (premature sperm activation)
- Poor milt quality (watery, thin milt with low sperm concentration)
- Eggs already beginning post-ovulatory aging at time of stripping (reduced fertilizability)
- Inadequate mixing of milt with eggs
Troubleshooting: Review stripping procedure to confirm eggs remained dry until milt addition; check milt quality assessment against the male selection criteria; review timing of stripping relative to the expected latency window.
Failure Type 4: Low Hatch Rate Despite Good Fertilization
Possible causes:
- Saprolegnia (fungal) infection during incubation
- Incubation water temperature instability
- DO depletion in incubation water
- Chemical contamination of incubation water (chlorine, disinfectant residual)
- Egg quality problems from broodstock nutritional deficiency
Troubleshooting: Check incubation DO and temperature records; inspect egg mass for fungal growth; test incubation water for chlorine; review broodstock diet formulation for essential fatty acid and vitamin content.
Summary
Induced spawning in African catfish is a technically manageable procedure whose outcomes are primarily determined by the quality of the broodstock at induction, the quality and dose of the hormonal agent used, the precision of the stripping timing relative to the latency window, and the fertilization procedure’s protection of egg viability until sperm activation. Each of these factors is within the hatchery manager’s control — failures in induction outcomes are diagnosable and correctable through the systematic troubleshooting approach in this guide.
The hatchery that documents each induction event — female identity, weight, hormone type and dose, injection time, water temperature at injection, stripping time, egg volume, fertilization rate, and hatch rate — builds the diagnostic database that converts individual spawn failures from frustrating mysteries into traceable, correctable management problems. The hatchery that induces without records repeats the same failures indefinitely without understanding why.
The next article covers hatchery management and larval rearing protocols — managing the larvae from hatch through to the fingerling stage where they can be transferred to nursery or grow-out facilities.