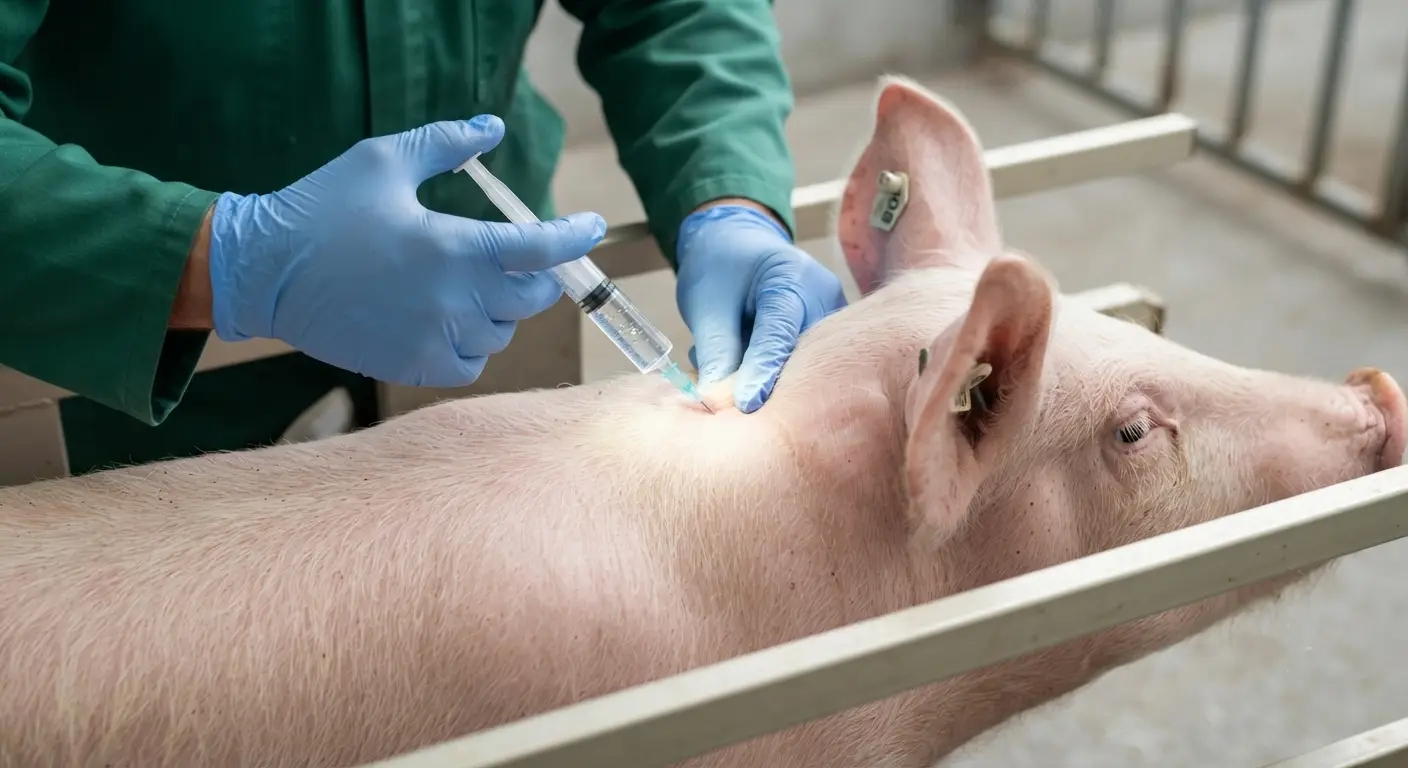
Every medication discussed in the piggery first-aid kit guide depends on a single, final, frequently underappreciated step: the physical act of getting that medication from the vial into the pig’s body, in the right tissue, at the right depth, without causing injury, contamination, or carcass damage. A farm can stock the correct antibiotic at the correct concentration, calculate the correct dose with precision, and still achieve a poor clinical outcome if the needle gauge is wrong for the formulation’s viscosity, the injection site is incorrectly chosen, or the technique introduces contamination at the injection point.
Injection technique is a manual skill, and like any manual skill, it is learned through correct instruction and repeated practice — not assumed knowledge that comes automatically with owning a syringe. The consequences of poor technique are not merely theoretical: abscesses at injection sites that require culling or carcass trimming at slaughter, broken needles embedded in muscle tissue that create both an animal welfare problem and a food safety hazard, medication that fails to achieve its intended absorption pattern because it was deposited in the wrong tissue layer, and the disease transmission risk of needles reused across multiple animals without proper changing protocol.
This guide builds the complete technical framework for safe, effective pig injection: needle gauge and length selection by medication type and pig size, the anatomical injection sites and how to identify them correctly, the specific techniques for intramuscular, subcutaneous, and intravenous administration, and the error patterns that most commonly compromise treatment outcomes in commercial pig production.
Understanding Needle Gauge — Why It Matters Beyond “Bigger or Smaller”
The Gauge System
Needle gauge follows an inverse numbering system — the higher the gauge number, the smaller the needle diameter. An 18-gauge needle is thicker than a 20-gauge needle, which is thicker than a 22-gauge needle. This inverse relationship is a frequent source of confusion for those unfamiliar with the system, and worth committing to memory before selecting equipment: lower number = bigger needle.
Why Gauge Selection Matters Clinically
Medication viscosity: Thick, viscous formulations (oil-based antibiotics, some long-acting injectable products, vitamin preparations with high concentration) require a larger-diameter (lower gauge number) needle to allow the medication to pass through without excessive injection pressure or syringe plunger force. Attempting to inject a viscous oil-based antibiotic through a needle gauge appropriate for thin, watery vaccine solution will be slow, difficult, and may cause the medication to “weep” back out of the injection site under the pressure required to force it through an inappropriately narrow needle.
Tissue trauma: Larger-diameter needles create a larger puncture wound and correspondingly more tissue trauma at the injection site — relevant both for animal welfare (pain, post-injection discomfort) and for the injection site reaction (localized swelling, potential abscess formation) that can compromise carcass value if the site is in a high-value primal cut.
Pig size and skin/muscle thickness: Smaller pigs have thinner skin and less muscle mass — a needle that is appropriately sized for a 100 kg sow’s thick skin and substantial neck muscle would be excessively traumatic, and potentially difficult to control precisely, for a 2 kg neonatal piglet’s comparatively delicate tissue.
Standard Needle Gauge and Length Selection by Pig Size
| Pig Category | Body Weight | Needle Gauge | Needle Length | Primary Use |
|---|---|---|---|---|
| Neonatal piglet | 1–5 kg | 20 gauge | 1.5 cm (⅝ inch) | IM injections (iron, vitamin B-complex) |
| Weanling | 5–15 kg | 18–20 gauge | 1.5–2.5 cm (⅝–1 inch) | IM injections (vaccines, antibiotics) |
| Grower | 15–50 kg | 16–18 gauge | 2.5 cm (1 inch) | IM injections |
| Finisher | 50–110 kg | 16–18 gauge | 2.5–3.8 cm (1–1.5 inch) | IM injections |
| Sow/Boar | 130–350 kg | 14–16 gauge | 3.8 cm (1.5 inch) | IM injections, particularly viscous medications |
Adjustments for specific medication types:
- Viscous oil-based products (some long-acting antibiotics): Use the lower end of the gauge number range (larger needle) for the pig’s size category — a 16 gauge rather than 18 gauge for a finisher pig receiving a viscous formulation
- Vaccines (typically thin, watery suspensions): Standard gauge for pig size is appropriate; no adjustment typically needed
- Subcutaneous injections (some vaccines, some anthelmintics like ivermectin): Generally a shorter needle length than the equivalent intramuscular injection for the same pig size, since subcutaneous deposits the medication in the layer just beneath the skin rather than deep into muscle
Understanding Injection Routes
Intramuscular (IM) — The Most Common Route for Pig Medications
What it is: Injection directly into muscle tissue, where the rich blood supply allows relatively rapid absorption of the medication into systemic circulation.
When used: The majority of pig vaccines, antibiotics, and many other medications are formulated for IM administration — it provides a good balance of reasonably rapid absorption with less tissue trauma than intravenous administration and more reliable, predictable absorption than subcutaneous administration for many formulations.
Technique: Needle inserted perpendicular to the skin surface, to the full depth appropriate for the needle length selected, into the chosen muscle mass.
Subcutaneous (SC) — For Specific Medication Types
What it is: Injection into the layer of loose connective tissue just beneath the skin, above the muscle layer. Absorption is generally slower than IM injection, as this tissue layer has a less extensive blood supply.
When used: Some vaccines (specifically formulated for SC use — verify the product label, as not all vaccines are interchangeable between IM and SC routes despite seeming similar), ivermectin (the standard route for injectable ivermectin in pigs), and some other anthelmintic products.
Technique: The needle is inserted at a shallow angle (typically 30–45 degrees from the skin surface, rather than the perpendicular insertion used for IM) into the loose skin fold, ensuring the needle tip remains in the subcutaneous space rather than penetrating into underlying muscle. The classic technique involves “tenting” the skin — pinching and lifting a fold of skin to create space between skin and muscle, then inserting the needle into the base of this tented fold.
Intravenous (IV) — Reserved for Specific Situations
What it is: Direct injection into a vein, providing immediate systemic availability of the medication — the fastest onset of action of any injection route, but also the route with the least margin for error, since the medication is delivered directly and immediately into circulation without the buffering effect of absorption from a tissue depot.
When used: Limited to specific clinical situations requiring rapid systemic effect — certain emergency treatments, some formulations of calcium borogluconate for severe hypocalcemia, and other situations where the urgency justifies the higher technical demand and risk of the IV route.
Technique: Requires identification and cannulation of an accessible vein — in pigs, the ear vein is the most commonly used and most accessible site for IV access by farm personnel with appropriate training, though larger veins (jugular, cranial vena cava) are used by veterinarians for specific procedures requiring larger volume or more reliable access.
Caution: IV administration carries higher risk of adverse reaction if the medication is not appropriate for IV use (some formulations are specifically labeled IM/SC only and can cause severe, potentially fatal reactions if given IV) or if administration rate is too rapid. IV injection should generally be reserved for veterinary-trained personnel or performed only under specific veterinary guidance for products explicitly labeled as appropriate for farm-level IV administration.
Oral and Intranasal Routes
While not “injections” in the conventional sense, these routes are referenced here for completeness, as they are alternatives to injection for several medication categories covered in the first-aid kit guide (oral electrolytes, oral anthelmintics, intranasal vaccines) — selected by the manufacturer based on the specific product’s formulation and the immune or therapeutic response desired.
Injection Site Selection — Anatomy and Technique
The Neck — The Standard Site for Most Pig Injections
Why the neck is preferred:
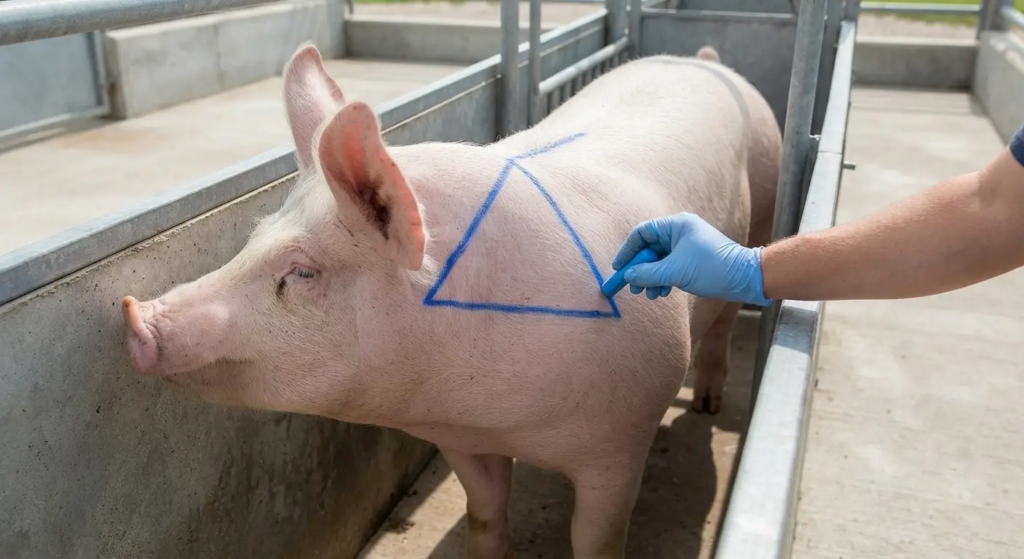
The neck muscle mass, located in the triangular area bounded by the base of the ear, the top of the shoulder, and the spine, is the standard injection site for the majority of pig vaccines and medications for several specific reasons:
- Carcass value protection: Injection site reactions (localized inflammation, occasional abscess formation) are a known, expected consequence of intramuscular injection, even when technique is correct. When these reactions occur in the neck, the affected tissue is in a lower-value primal cut (relative to the ham or loin) — meaning any necessary trimming at slaughter removes value from a less expensive portion of the carcass rather than the most expensive cuts
- Accessibility: The neck region is relatively accessible for injection even in a standing, minimally restrained pig, compared to attempting injection in the ham (which requires the pig to be positioned in a way that exposes that muscle mass safely)
- Reduced nerve and major blood vessel risk: The neck muscle mass, when the correct anatomical location is used, has lower risk of inadvertent needle contact with major nerves or blood vessels compared to some alternative sites
Locating the correct neck injection site:
The target area is the triangle formed by drawing an imaginary line from the base of the ear down to the top of the front leg/shoulder, and a second line along the top of the neck from the base of the ear back toward the shoulder blade. The injection point should be within this triangle, avoiding injection too close to the ear (risk of injecting near the ear cartilage and associated structures) and avoiding injection too far back toward the shoulder blade (risk of contacting the scapula bone or associated structures).
Practical guidance: For most pigs, a point approximately one hand’s width behind the base of the ear, and slightly below the top of the neck (avoiding the prominent nuchal crest/ligament along the very top of the neck), provides reliable access to substantial neck muscle mass with minimal risk of contacting bone, major vessels, or nerves.
Rotation Within the Neck Site
When multiple injections are required over time (repeated vaccination doses, multi-day antibiotic courses), rotate the specific injection point within the neck triangle area — alternating sides (left/right) and varying the precise location within the acceptable zone — rather than repeatedly injecting into the same point. Repeated injection into the same precise location increases local tissue trauma, scar tissue formation (which itself impairs future medication absorption at that site), and the cumulative risk of abscess formation.
Alternative Sites for Specific Situations
Ham (gluteal muscle): Occasionally used, particularly for larger-volume injections in adult sows and boars where the neck muscle mass may not comfortably accommodate the required volume, or for specific medications where the manufacturer recommends this site. The carcass value consideration described above means this site should be used only when specifically indicated, not as a default alternative to the neck.
Subcutaneous sites (for SC-specific products like ivermectin): Typically administered in the loose skin behind the ear or along the flank, where adequate loose skin is available for the tenting technique described in Part 2.
Ear vein (for IV access): The lateral ear vein, visible as a prominent vessel running along the outer edge of the pig’s ear, is the standard site for IV access in pigs by trained personnel, given its accessibility without requiring the more invasive restraint needed for jugular or other central vein access.
Step-by-Step Injection Technique
Pre-Injection Preparation
Step 1 — Verify the medication: Check the product label against the treatment plan — correct medication, correct concentration, expiry date not passed, no visible discoloration or particulate matter in the vial (which can indicate degradation or contamination)
Step 2 — Calculate and draw up the correct dose: Using the dosing reference (as detailed in the first-aid kit guide) and an accurate weight estimate or measurement for the specific animal, calculate the volume to be administered and draw this volume into the syringe, expelling any air bubbles before proceeding
Step 3 — Select the appropriate needle: Match needle gauge and length to the pig’s size and the medication’s viscosity, per the guidance in Part 1
Step 4 — Restrain the animal appropriately: For piglets, secure hold by the operator or an assistant. For larger pigs, use a hog snare, handling board, or chute restraint as appropriate to the animal’s size and temperament, ensuring the operator has safe, stable access to the injection site without risk of the animal moving unpredictably during the procedure
Injection Technique — Intramuscular
Step 1 — Locate the injection site: Identify the correct neck triangle location as described in Part 3
Step 2 — Clean the site (where practical): For routine vaccination in clean, dry conditions, this step is often abbreviated in commercial practice, but for any injection where the skin is visibly soiled, wiping the site with an alcohol swab or appropriate disinfectant before injection reduces the risk of introducing surface contamination into the injection site
Step 3 — Insert the needle: With a firm, confident, single motion, insert the needle perpendicular to the skin surface to its full length (assuming correct length selection for the pig’s size — the needle should not need to be inserted to a depth beyond what is visible as appropriate muscle penetration)
Step 4 — Aspirate (where appropriate): Pull back slightly on the syringe plunger before injecting — if blood appears in the syringe, this indicates the needle tip is in a blood vessel rather than muscle tissue, and the needle should be withdrawn slightly and repositioned before proceeding. This step is a standard safety check, though in practice, with experienced technique and correct site selection, blood vessel contact is uncommon at the standard neck injection site
Step 5 — Inject the medication: Depress the plunger steadily, delivering the full calculated dose
Step 6 — Withdraw the needle: Remove the needle in a single smooth motion, in the same line as insertion (avoid angling the needle during withdrawal, which increases tissue trauma)
Step 7 — Apply pressure if needed: Brief pressure with a clean finger or cloth at the injection site can reduce any minor leakage or bleeding, particularly relevant for larger-volume injections
Injection Technique — Subcutaneous
Step 1 — Locate the site and tent the skin: At the chosen subcutaneous site (typically behind the ear or along the flank), pinch and lift a fold of skin between thumb and forefinger, creating the “tent”
Step 2 — Insert the needle at the base of the tent: At a shallow angle (30–45 degrees) into the space created by the tented skin fold, ensuring the needle tip is positioned in the subcutaneous space rather than passing through into underlying muscle
Step 3 — Aspirate, inject, and withdraw: Following the same aspiration check, injection, and withdrawal principles as the IM technique, adjusted for the shallower needle angle and the different tissue target
Needle Management — Changing Frequency and Disposal
When to Change Needles
The standard rule: change needles after every 20 injections, or more frequently under any of the following conditions:
- The needle has visibly contacted manure, soil, or other obvious contamination
- The needle shows any visible damage — burrs at the tip, bending, or any deformity that would increase tissue trauma or risk needle fragment retention
- Moving between groups of pigs where disease transmission risk between groups is a specific concern (for example, moving from a known PRRS-positive group to a PRRS-negative group — though ideally separate equipment entirely would be used in this scenario, not merely a needle change)
- The needle has become dull (resistance to insertion is noticeably increased compared to a fresh needle) — dull needles increase tissue trauma and pain regardless of contamination status
The One-Needle-One-Pig Principle
For the highest level of disease transmission risk mitigation — particularly relevant for blood-borne pathogens like PRRS that can be mechanically transmitted via contaminated needles — using a completely new, sterile needle for every individual pig eliminates this transmission pathway entirely. While the “change every 20 injections” rule is the practical standard for routine, lower-risk vaccination events, operations managing a confirmed PRRS-positive herd, or implementing the highest biosecurity standard, should consider one-needle-one-pig as the default practice, accepting the additional cost of needle consumption as justified by the disease transmission risk reduction.
Needle Disposal
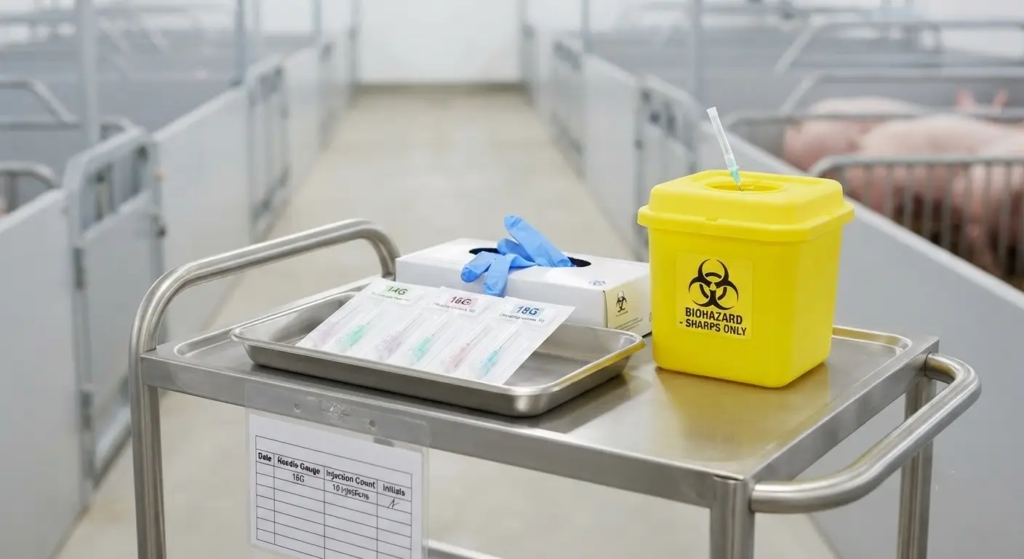
Used needles should be disposed of in a dedicated sharps container — a puncture-resistant container specifically designed for needle disposal, available from medical/veterinary suppliers, or improvised from a puncture-resistant container (a hard plastic bottle with a secure lid) where dedicated sharps containers are not locally available. Needles should never be disposed of in general farm waste, where they pose injury risk to personnel handling waste and potential food safety risk if a needle fragment were to enter the manure stream and subsequently the feed or food chain through composted manure application to food crops.
Common Injection Errors and Their Consequences
Error 1: Needle Too Small for Medication Viscosity
Consequence: Excessive injection pressure required, slow administration, increased risk of medication “weeping” back out through the injection site (reducing the effective delivered dose below the intended amount), and increased handler frustration that can lead to rushed, less careful technique on subsequent injections.
Correction: Match needle gauge to the specific medication’s viscosity, not only to the pig’s size — verify the product label or manufacturer recommendation for viscous formulations.
Error 2: Injection Too Shallow (Inadequate Penetration Depth)
Consequence: Medication intended for intramuscular deposit is instead deposited in subcutaneous fat or loose connective tissue, where absorption characteristics differ from the intended muscle deposit — potentially resulting in slower, less predictable, or reduced absorption, and increased risk of local irritation reaction at the more superficial injection site.
Correction: Use the correct needle length for the pig’s size (per Part 1 guidance) and insert to the full needle length, not a partial insertion that fails to reach the intended muscle depth.
Error 3: Injection Site Contamination
Consequence: Bacterial introduction at the injection site, leading to localized abscess formation — a welfare concern for the animal, a potential source of chronic pain and reduced performance, and a carcass quality/condemnation risk at slaughter if the abscess is present in the muscle tissue at the time of processing.
Correction: Clean visibly soiled injection sites before injection; maintain clean needle handling practice (do not allow the needle to contact non-sterile surfaces before injection); follow the needle-changing protocol described in Part 5.
Error 4: Reusing Needles Excessively
Consequence: Beyond the disease transmission risk addressed in Part 5, needles used repeatedly become progressively duller, increasing tissue trauma with each subsequent use, and progressively more likely to harbor contamination from previous injection sites — compounding both the welfare and the abscess-risk consequences of poor technique.
Correction: Strict adherence to the needle-changing schedule, regardless of the apparent convenience of continuing with a “still usable” needle.
Error 5: Injecting Into Scar Tissue
Consequence: Previous injection sites that have developed scar tissue have reduced blood supply compared to healthy muscle tissue — medication injected into or near scar tissue may show significantly reduced and delayed absorption, potentially compromising the treatment’s clinical effectiveness even though the injection itself was technically performed correctly.
Correction: Rotate injection sites within the acceptable injection zone (as described in Part 3), avoiding repeated injection into the precise same location, particularly for animals receiving multiple treatment courses over their production life.
Error 6: Needle Breakage
Consequence: A broken needle with a fragment remaining embedded in the pig’s tissue is both an animal welfare problem (potential for migration, infection, or chronic discomfort) and a significant food safety hazard if the fragment is not located and removed before the animal enters the food chain — broken needle fragments in pork products are a serious quality and safety failure that can result in product recalls and significant reputational and financial damage in formal supply chain contexts.
Causes: Needle bending from inappropriate restraint allowing animal movement during injection, using a damaged or already-bent needle, or excessive lateral force applied to the needle during insertion or withdrawal.
Correction and response: Use appropriate restraint to minimize animal movement during injection; never attempt to straighten and reuse a bent needle; if a needle does break with a fragment remaining in tissue, this should be documented immediately (animal identification, injection site location, date) and the animal should be flagged for veterinary assessment and potential removal of the fragment, or, where removal is not feasible, the animal should be permanently identified and excluded from the normal slaughter pathway, with the situation disclosed to the receiving abattoir or processor.
Special Considerations for Different Pig Categories
Neonatal Piglets
- Smallest needle gauge and length appropriate (20 gauge, 1.5 cm) given the minimal muscle mass and thin skin
- Restraint typically by hand-holding rather than mechanical restraint equipment, requiring a second person to hold the piglet securely while the injection is administered
- The neck injection site remains standard, though the smaller overall size of the animal means more precise site identification is needed to avoid contacting bone or other structures in the proportionally smaller anatomical space
Sows and Boars
- Larger needle gauge and length, particularly for viscous formulations
- Restraint considerations are more significant given the animal’s size and potential for defensive or aggressive response — use of a hog snare, handling chute, or at minimum confining the animal in a stall or crate where movement is limited improves both handler safety and injection accuracy
- For boars specifically, as detailed in boar management guidance in this series, particular attention to handler safety given the animal’s size and potential temperament challenges
Animals Requiring Repeated Treatment
For animals receiving a multi-day treatment course (such as a several-day antibiotic regimen), maintain a clear record of which side of the neck was used for each injection, supporting the site rotation principle described in Part 3 and avoiding the cumulative tissue trauma of repeated injection into the same precise location.
Summary
Correct needle gauge selection, correct injection site identification, and correct technique are the final, frequently underemphasized steps that determine whether the medications and dosing knowledge covered throughout the health management content in this series actually achieve their intended clinical effect. A correctly selected antibiotic at a correctly calculated dose, injected with an inappropriate needle gauge into the wrong tissue layer or a contaminated site, delivers a compromised therapeutic outcome despite every preceding decision having been made correctly.
The technical framework in this guide — gauge selection matched to pig size and medication viscosity, the standard neck injection site that protects carcass value while providing reliable access and absorption, the step-by-step technique for intramuscular and subcutaneous administration, and the needle management discipline that prevents both disease transmission and the cumulative tissue trauma of poor technique — converts the theoretical knowledge of what medication to use into the practical skill of delivering it correctly.
This is a skill that improves with deliberate practice and correct initial instruction. Every staff member responsible for administering injections on a commercial pig farm should be trained in this technique directly, ideally through supervised practice under the guidance of an experienced handler or veterinarian, before being expected to perform injections independently. The cost of inadequate training — abscessed injection sites, broken needles, ineffective treatment from poor technique — exceeds the modest time investment that proper training requires many times over.